Importing models
This guide walks through the full end-to-end process — from dumping your own GameCube ROM to viewing animations and shiny variants on an imported Pokémon model.
1. Blender setup
Before following this guide, make sure Blender and the addon are installed. The home page covers both steps:
Once that's done, return here and continue with step 2.
2. Ripping your own GameCube ROM
To work with Pokémon Colosseum or XD models, you need a copy of the game's data on your computer. The data lives on the disc, so it has to be "dumped" — read off the physical disc and saved as a single file (the ROM, also called an ISO).
.iso (sometimes .gcm) file, which is what the rest of this
guide refers to.
3. Getting model files from the ROM
An .iso is a single big file. Inside it is a tree of smaller files — the actual
code, models, music, scripts, and everything else that makes up the game. We use the
Dolphin emulator to crack the ISO open and pull those files out.
Step 1 — Install Dolphin
Download the latest stable build of Dolphin from dolphin-emu.org and install it. It's free and works on Windows, macOS, and Linux.
Step 2 — Add your ROM to Dolphin's game list
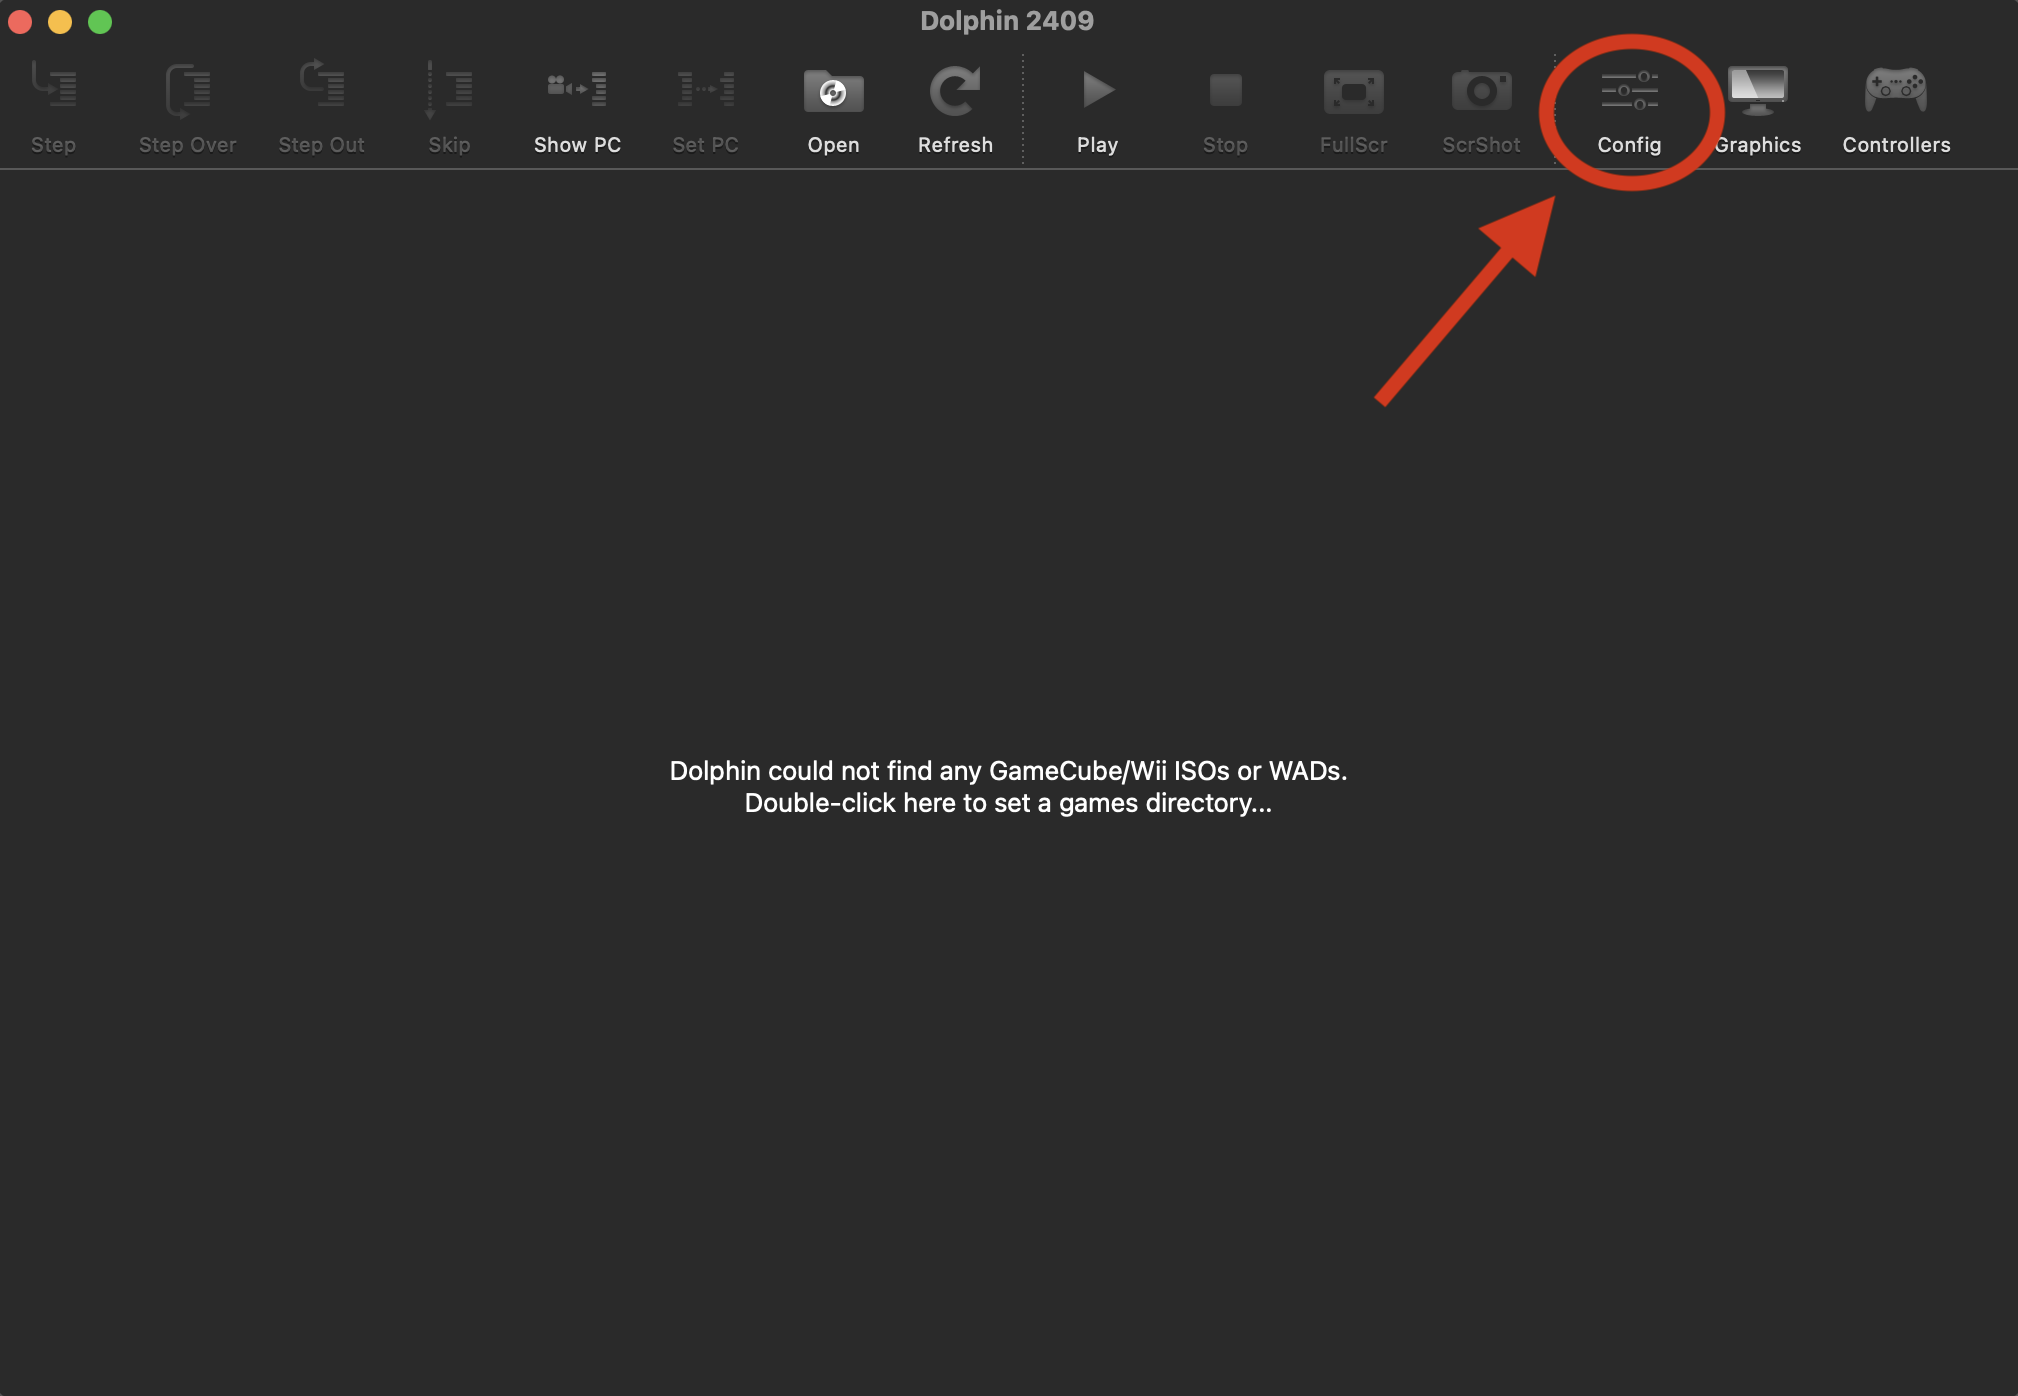
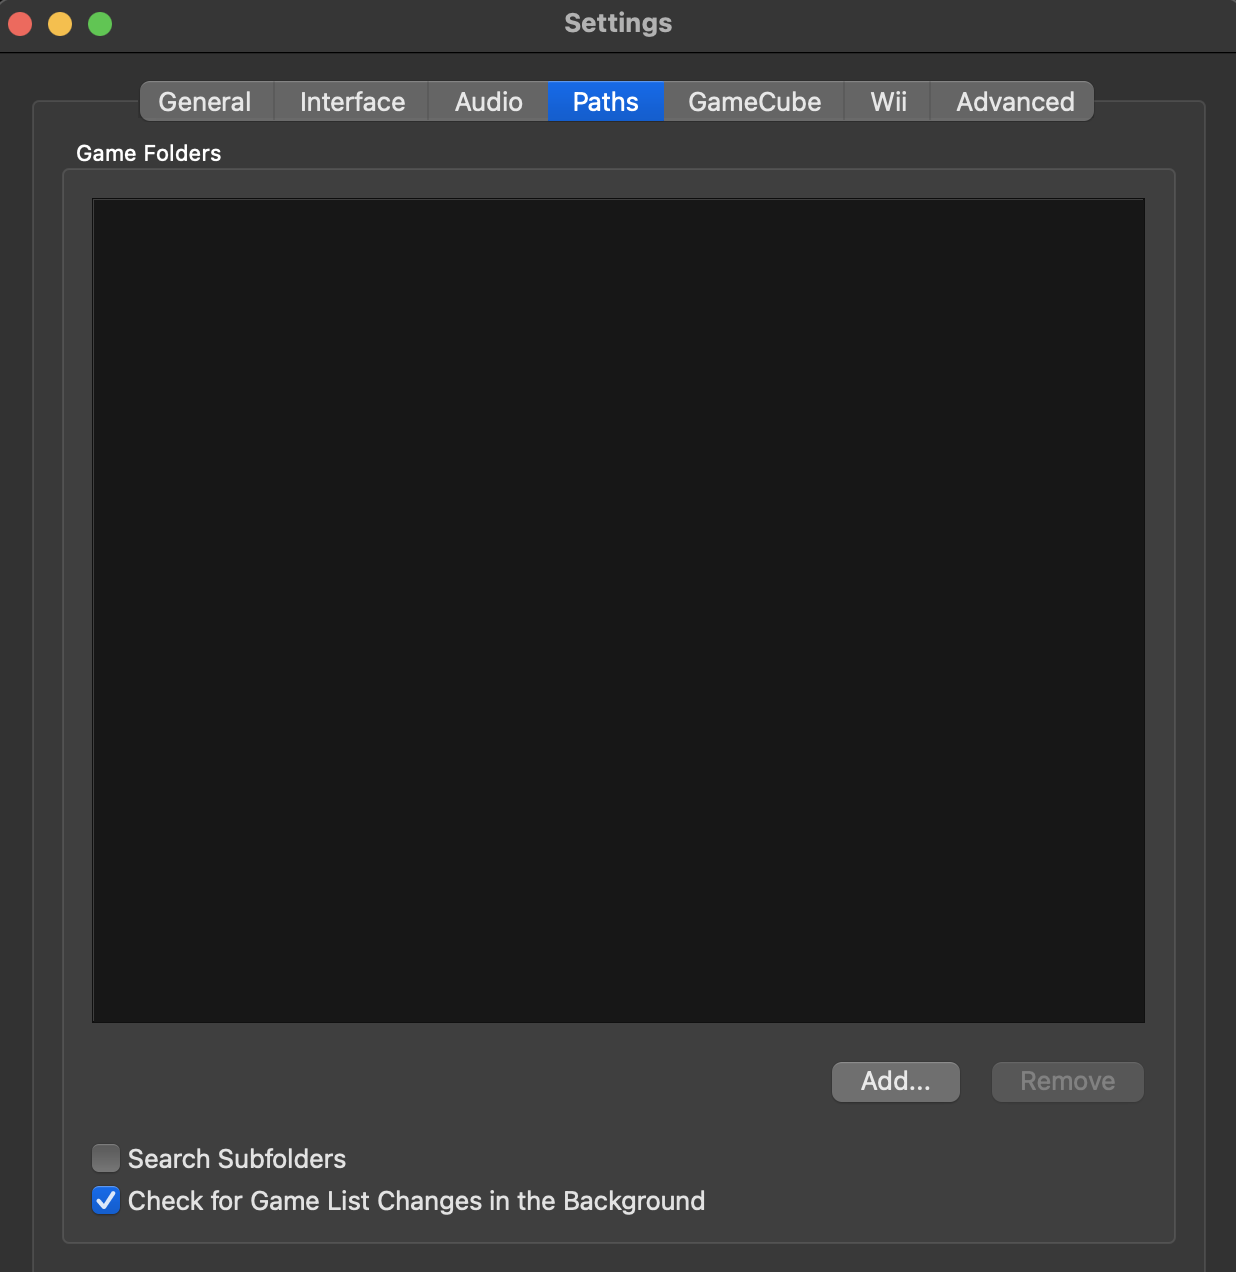
Launch Dolphin. Open the Config menu and click Paths.
In the dialog, click Add, then browse to the folder containing your
.iso. Close the dialog — your game will appear in Dolphin's main window.
.iso file.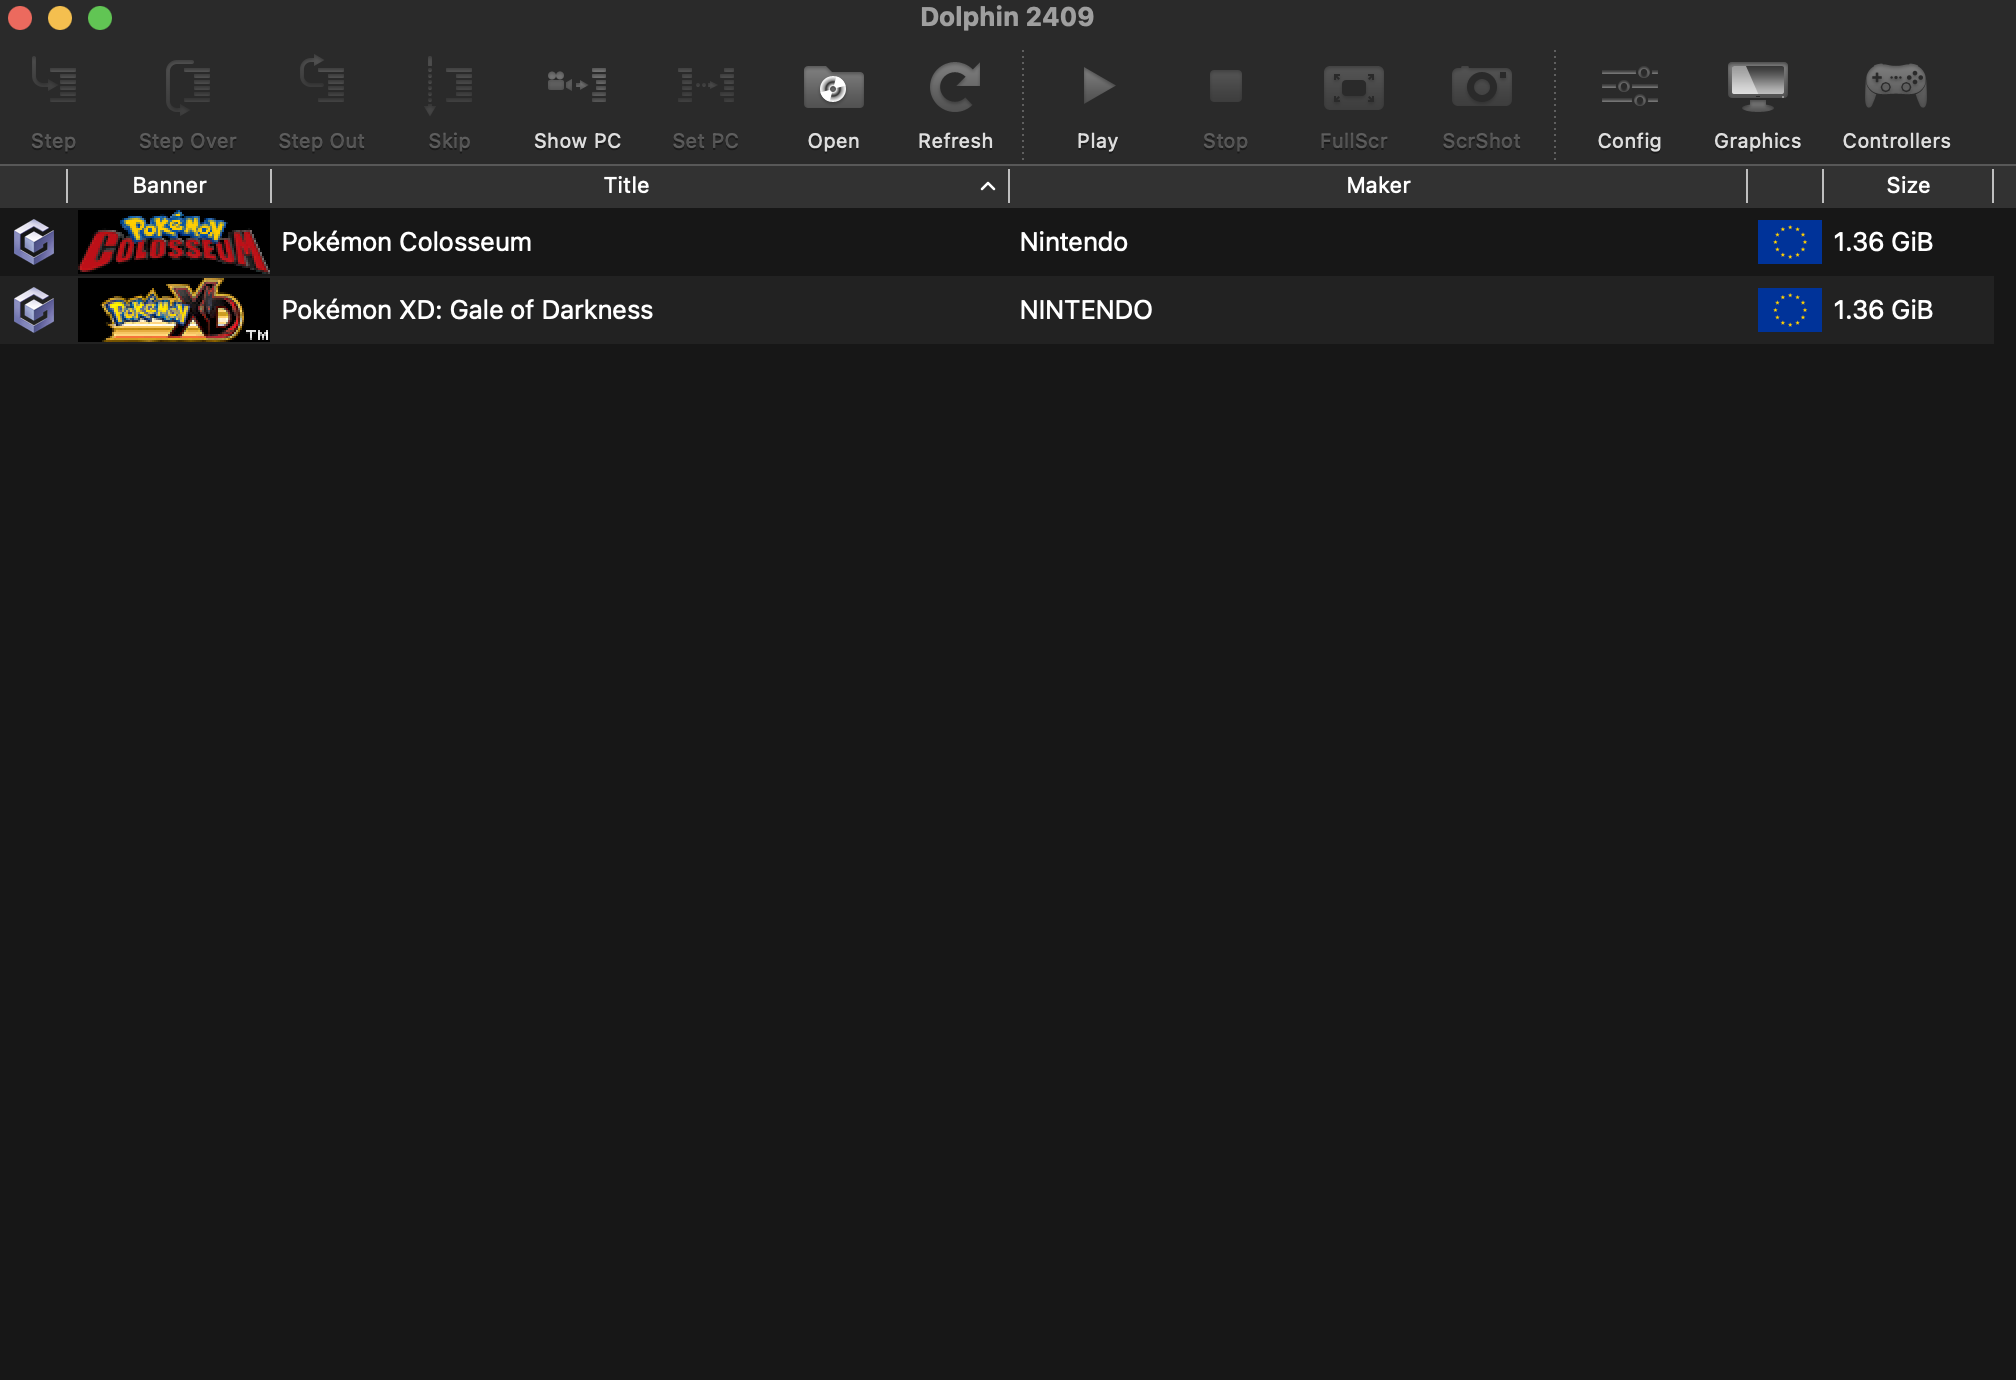
Step 3 — Open the disc's contents
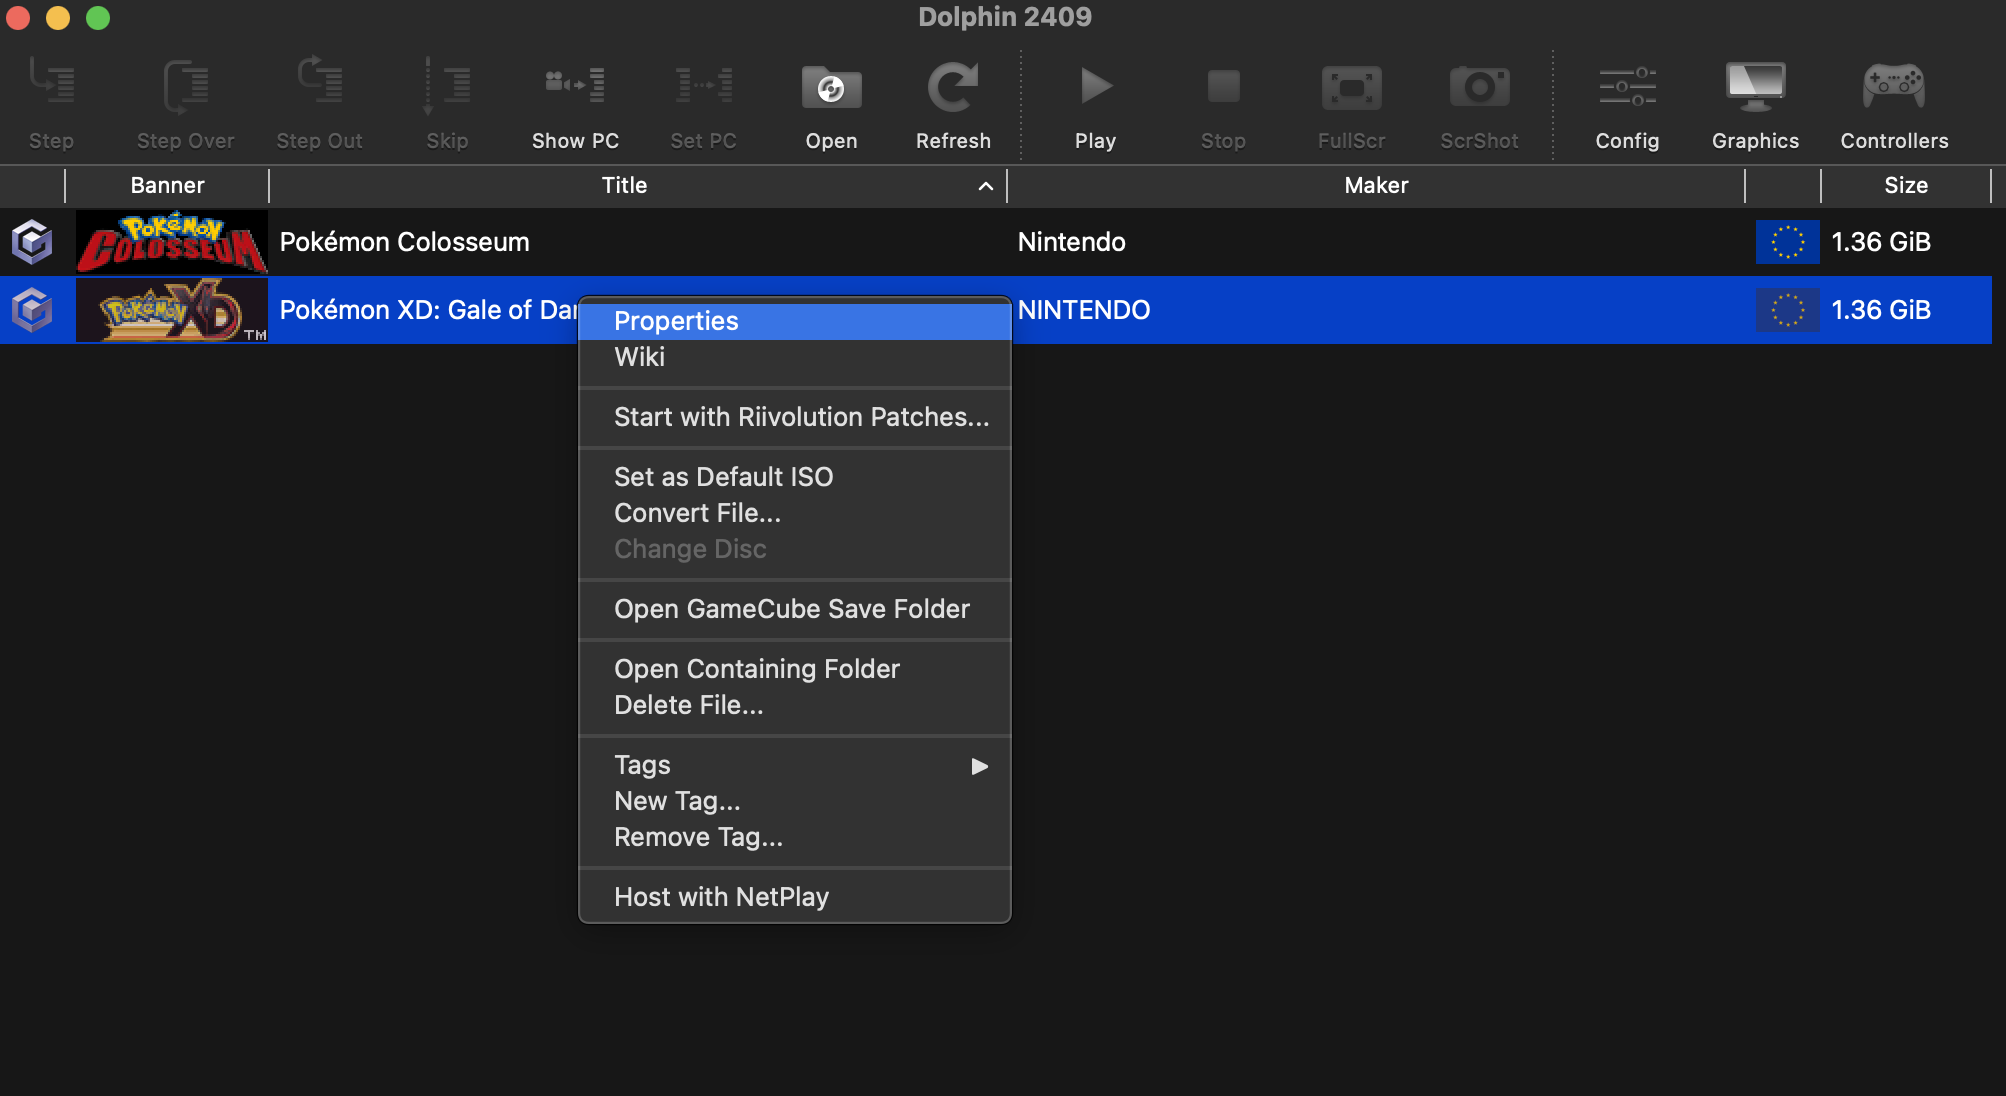
Right-click your game in the list and choose Properties. In the window that opens, click the Filesystem tab. This shows the tree of files stored inside the disc.
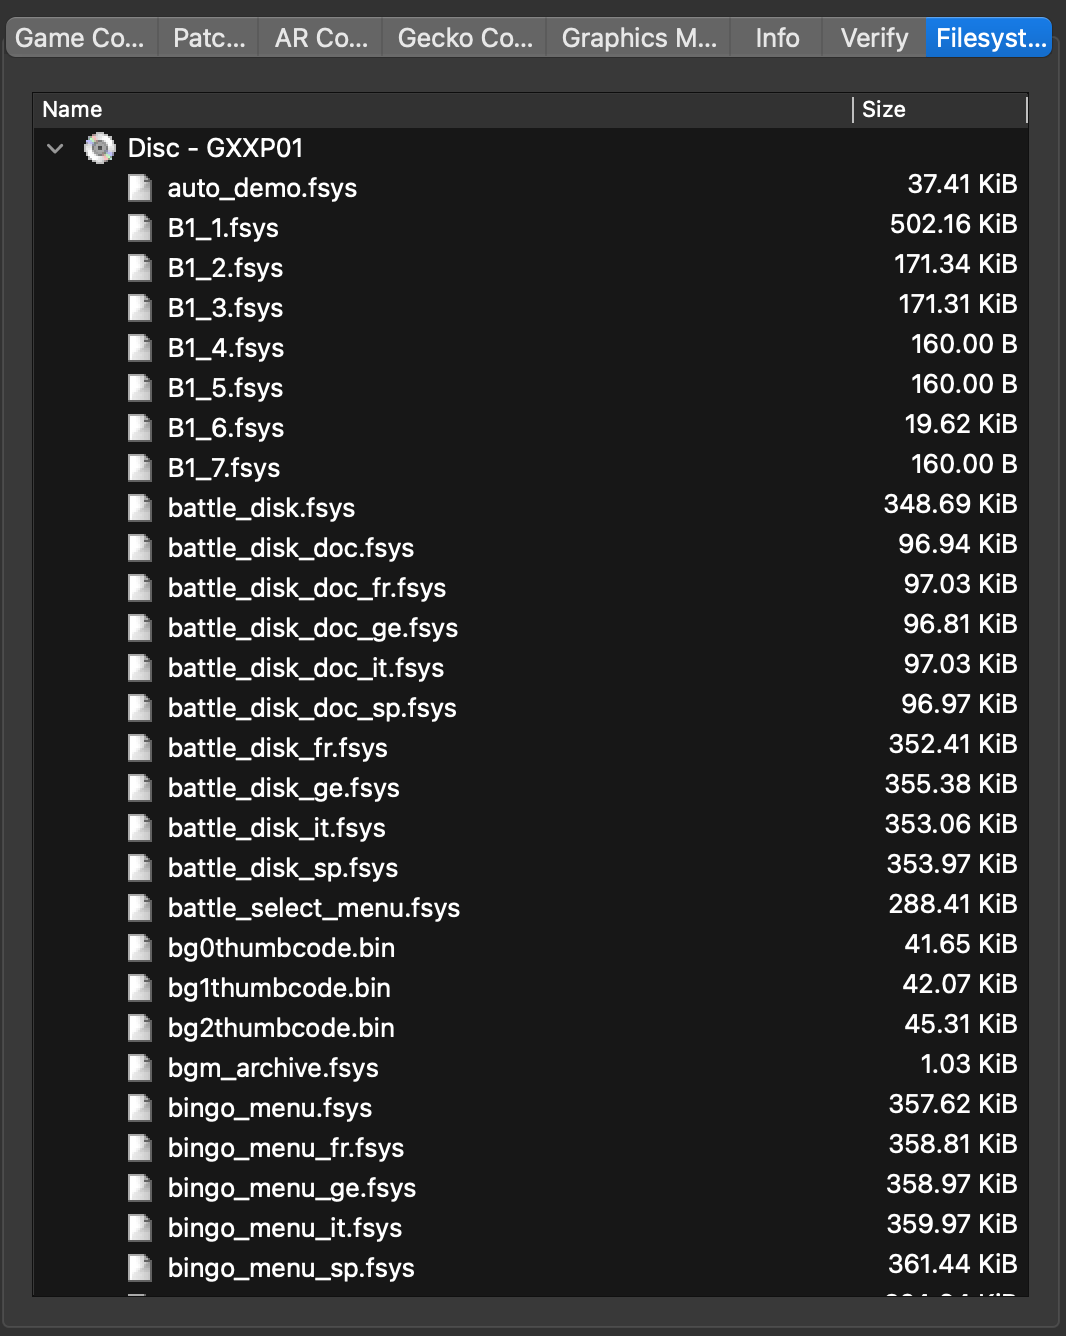
Step 4 — Extract the disc to a folder
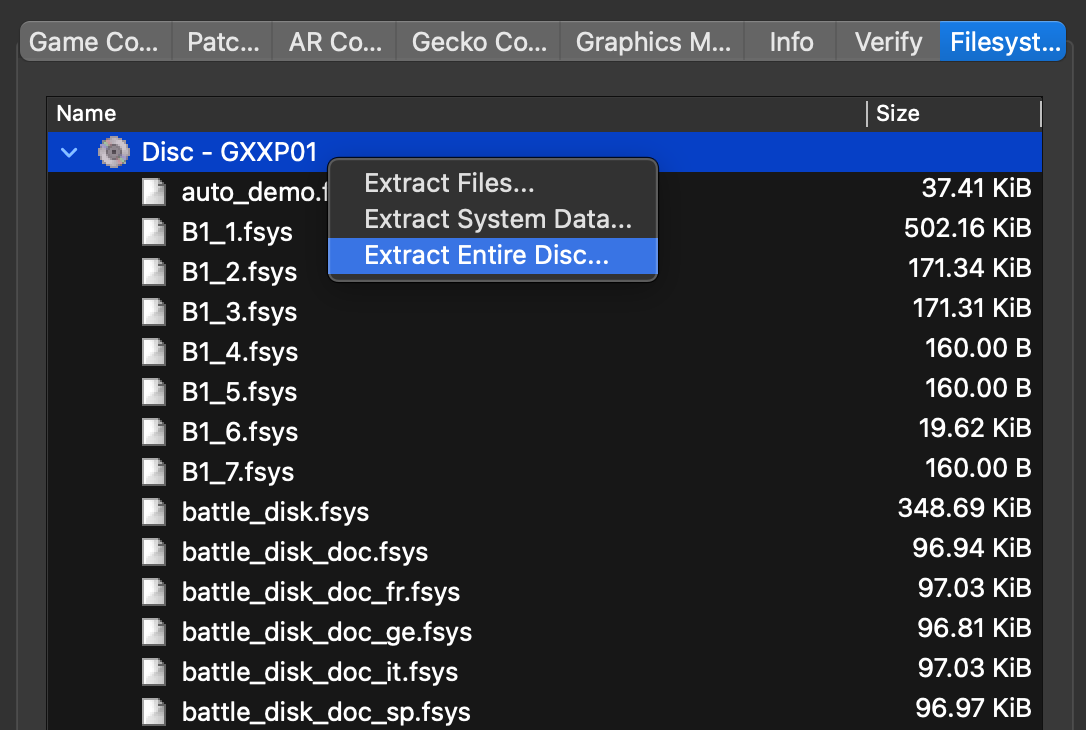
At the top of the file tree there's an entry called Disc. Right-click it and
choose Extract Entire Disc…. Pick an empty folder on your computer to extract
into — for example, a new folder on your Desktop called Pokemon-XD-Dump. Wait a
few minutes while it extracts.
Step 5 — Find the model files
Inside the folder you extracted to, you'll find two subfolders: sys/ (system
files) and files/ (game data). The model files live inside files/,
usually packaged into archives ending in .fsys. Different kinds of model live
in different archives:
| Model type | File extension | Where to find it |
|---|---|---|
| Pokémon and trainer battle models | .pkx |
Inside pkx_<name>.fsys archives — for Pokémon, the name is
the species' Japanese name transliterated in romaji (e.g. pkx_fushigidane.fsys
for Bulbasaur). For trainers, it's their development codename, which rarely matches
the in-game name. |
| Map / scene models | .rdat |
Inside map archives such as M1_out.fsys. |
| Overworld models (NPCs, props) | .dat |
Inside the same map archives, and inside people_archive.fsys and a few others. |
| Battle-move animations | .wzx |
Inside wzx_*.fsys archives. |
| Cameras | .cam |
Usually inside the map archives too. |
.fsys archives themselves can also be loaded directly by the plugin — any
models contained in the archive are imported straight into the Blender scene.
pkx_*.fsys archives in Colosseum and XD, the name
in the filename is the species' Japanese name in romaji (for Pokémon) or the trainer's
development codename (which rarely matches the in-game name). If you're struggling to
find the right name, ask on the community Discord.
.fsys archives — the .dat model files are accessible directly
in the dumped files.
Step 6 — Extract the model from inside the archive
An .fsys file is itself an archive — it can contain multiple files of
different types (models, music, scripts, and any other kind of data) compressed and bundled
together. Think of it as the game's equivalent of a .zip file.
- Easiest — let Blender unpack it. The importer reads
.fsysfiles directly, so you can skip this step entirely and point Blender at the.fsysin the next section. - Manual — use the FSYS Tool. This page
has a browser-based tool that extracts
.fsysarchives without any installation. Open the FSYS Tool, click the Extract tab, pick your.fsysfile, and click Extract archive. The tool downloads a.zipyou can unpack to get the individual files inside (the model itself, plus any metadata the archive carries).
.fsys is also necessary if you plan to repack it later — for example,
after swapping out one of the models inside with a new one you exported with the plugin.
4. Importing a model
Once the plugin is installed and you have
an .fsys archive (or any other supported file type) on disk, importing is a
single menu choice.
Step 1 — Open the import dialog
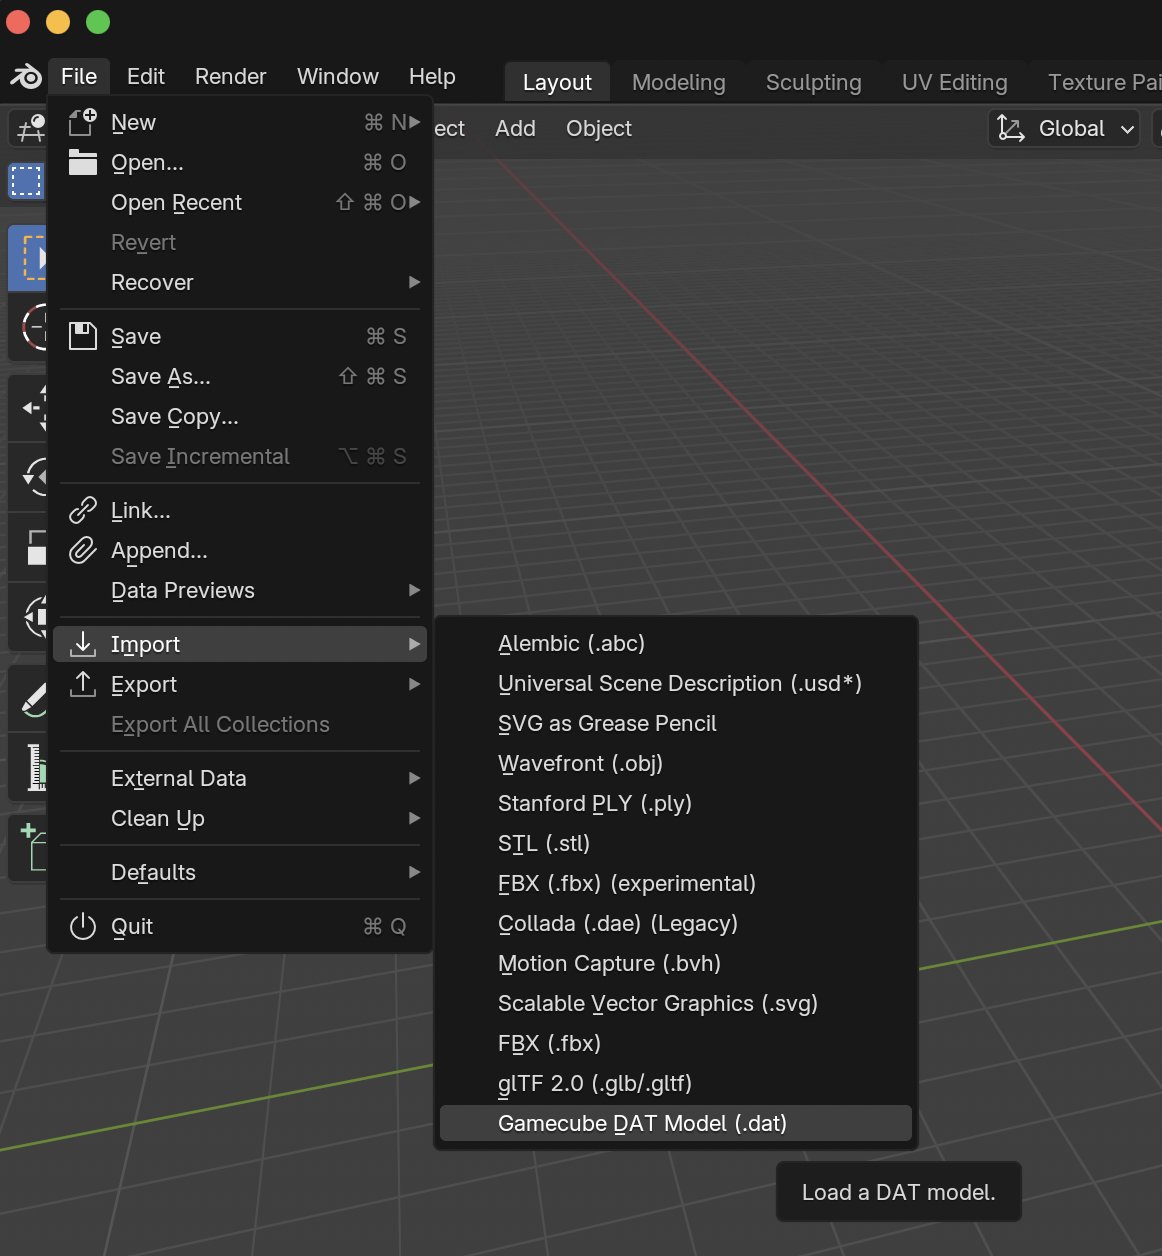
In Blender, open the File menu, hover over Import, and click Gamecube model (.dat). A file browser will open.
Step 2 — Pick a file
Browse to the model file you want to load. The importer accepts:
.fsys— the archive format used for game models. Most common starting point..pkx— a single Pokémon or trainer model, including shiny color info..dat,.fdat,.rdat— raw model files (usually already extracted from an.fsys)..wzx— battle-move animation files (animation data only, no mesh)..cam— camera data.
Step 3 — Choose your import options
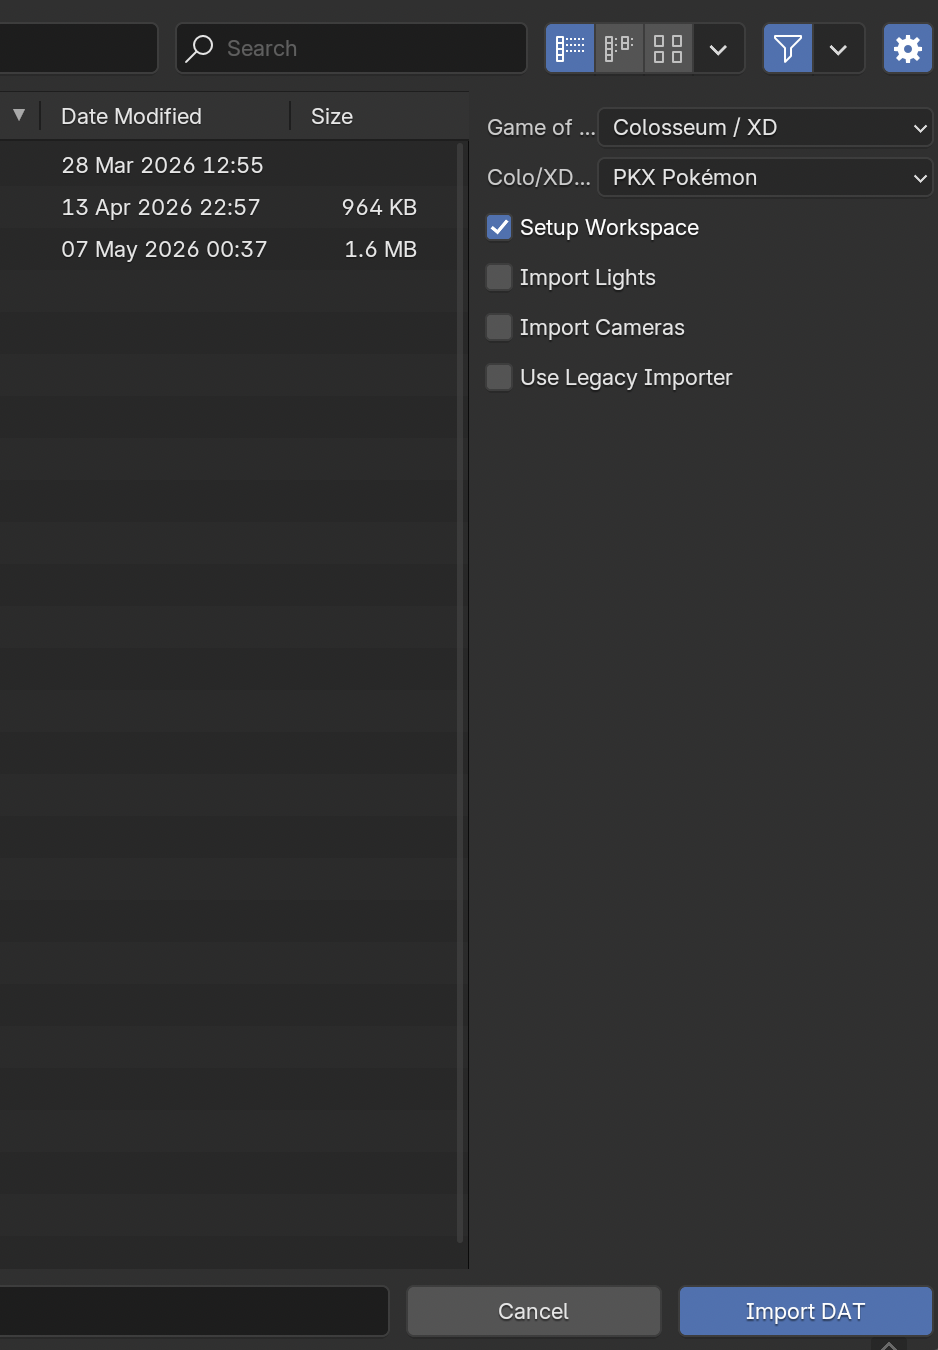
On the right-hand side of the file browser is a sidebar with several checkboxes and dropdowns. The defaults are fine for most Pokémon Colosseum / XD models, but here's what each one does:
| Option | Default | What it does |
|---|---|---|
| Game of Origin | Colosseum / XD | Tells the importer which game your file came from. Pick Kirby Air Ride, Super Smash Bros., or Other if your file is from one of those games instead. |
| Colo/XD Kind | PKX Pokémon | Visible only when the previous option is Colosseum / XD. Pick
PKX Pokémon for Pokémon models, PKX Trainer for trainer
models, or DAT Model for raw .dat files that aren't
Pokémon-related (overworld props, NPCs, etc.). |
| Setup Workspace | on | Auto-arranges the Blender workspace for animation work: splits the viewport, opens an Action Editor (animation panel), and sets playback to end at frame 60. Leave on unless you want to keep your current layout. |
| Import Lights | off | Most game models don't ship with lights. Turn on if you specifically need them. |
| Import Cameras | off | Same idea — only flip this on if the file contains camera data you care about (e.g. a cutscene camera). |
| Use Legacy Importer | off | Routes through the older import code path. For comparison/debugging only. Leave off. |
Step 4 — Click Import
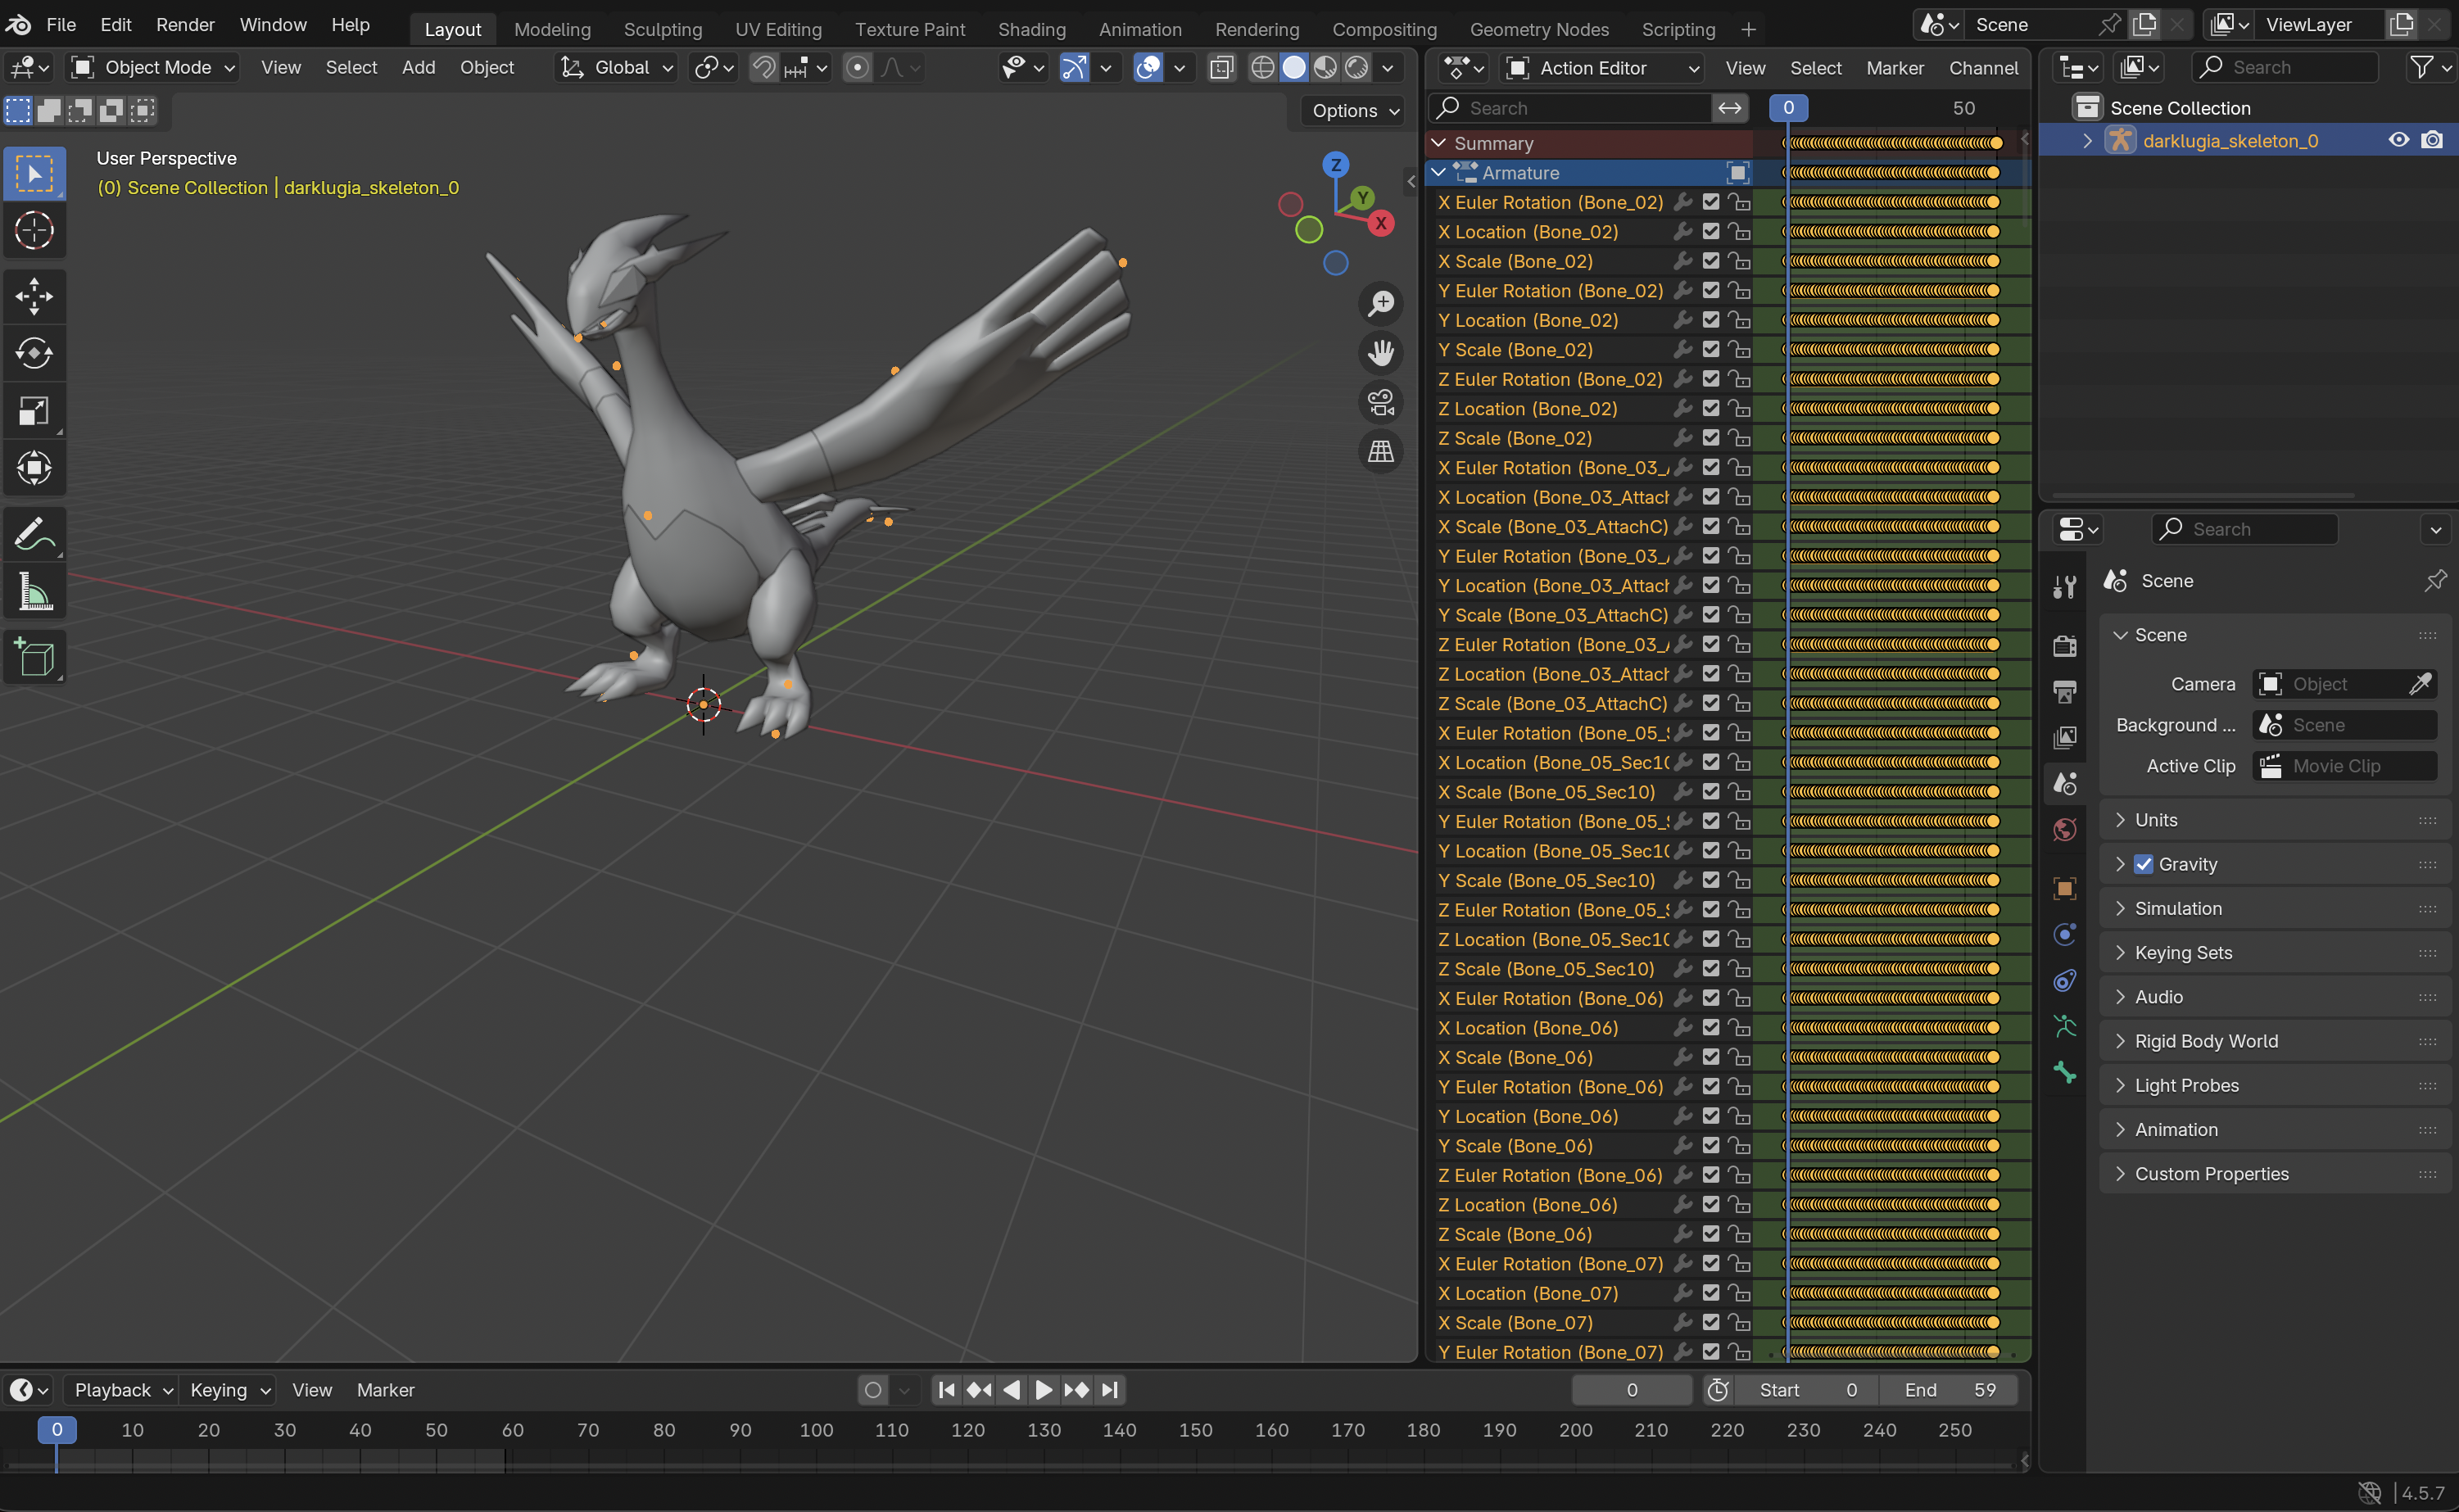
Click the blue Import DAT button at the bottom-right of the file browser. After a few seconds, the model appears in the viewport.
Step 5 — Switch the viewport to Material Preview
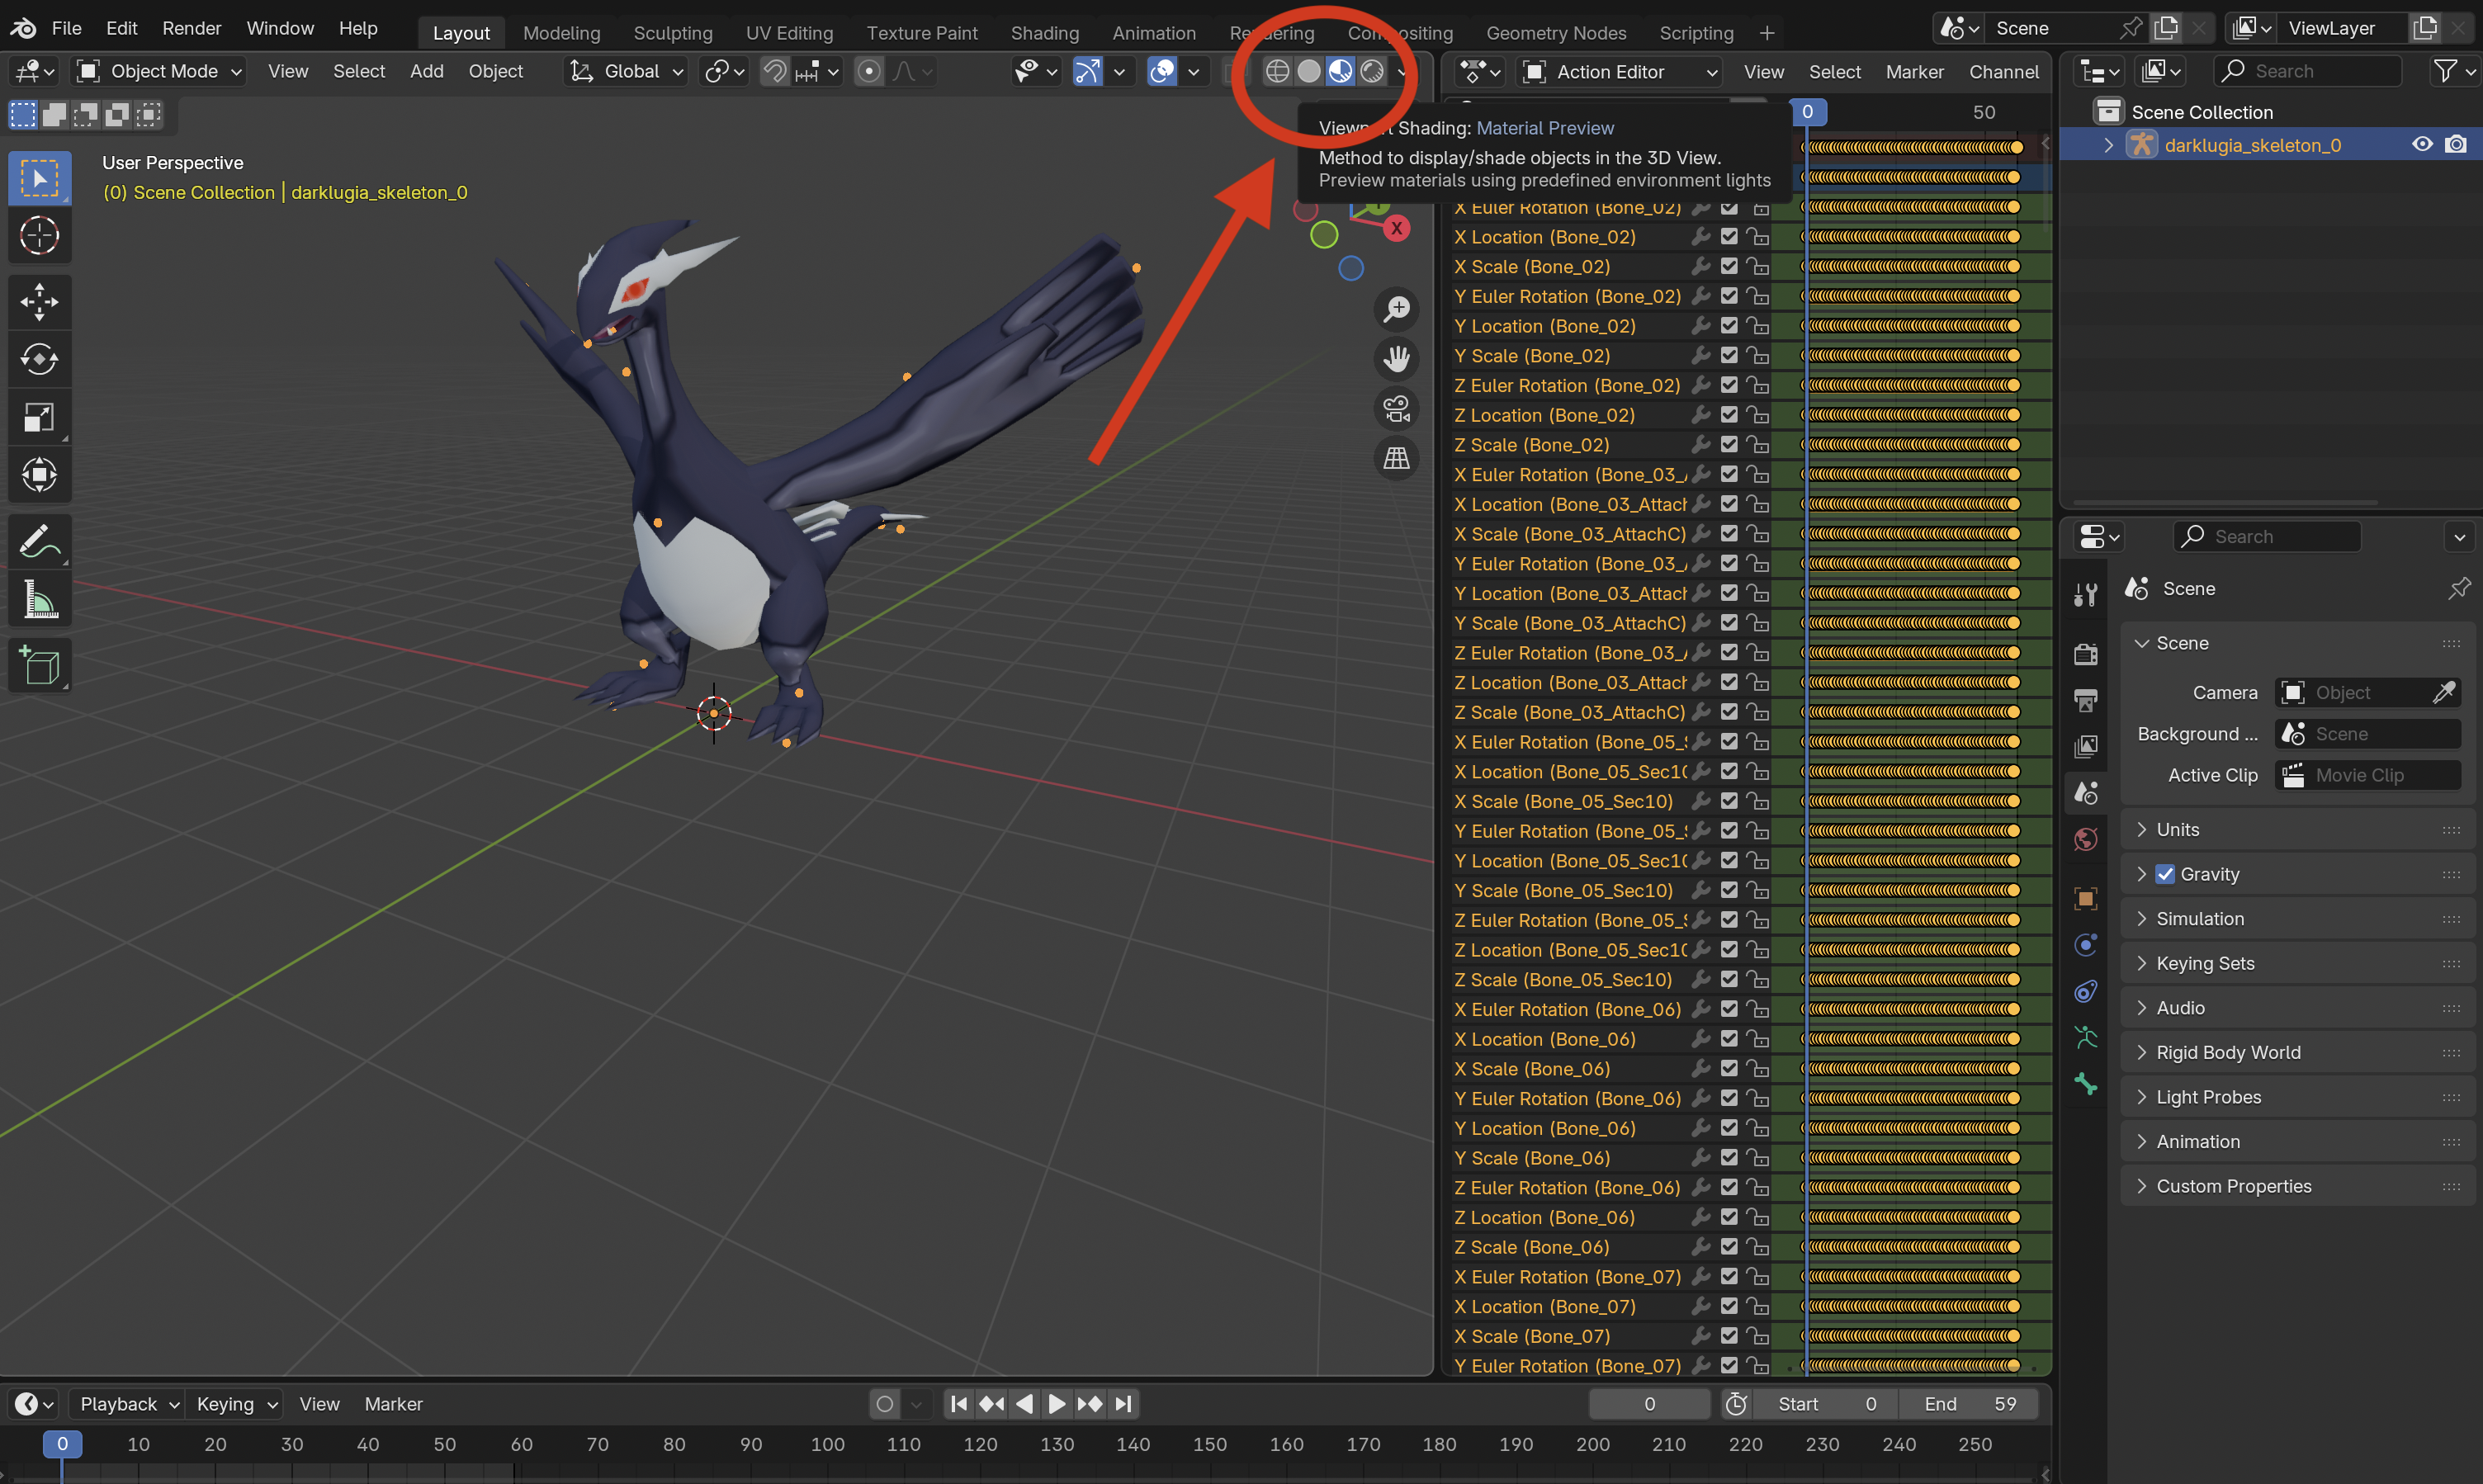
By default Blender shows the model in solid shading, so textures and materials don't appear. In the top-right corner of the 3D viewport, click the third sphere icon (Material Preview) to see the model with its textures applied.
What got imported
- The skeleton — an armature object holding every bone in its rest pose.
- The meshes — one Blender mesh per source mesh, parented to the armature.
- Materials and textures — full shader graphs are rebuilt; textures are unpacked from the source file and stored in the Blender scene.
- Animations — one Blender Action per animation track. See the next section for how to play them back.
- Lights and cameras — only if you ticked the corresponding option.
5. Viewing animations
Each animation in the source file becomes a Blender Action. Actions are interchangeable animation clips you can switch between on the same armature.
Step 1 — Find the Action Editor
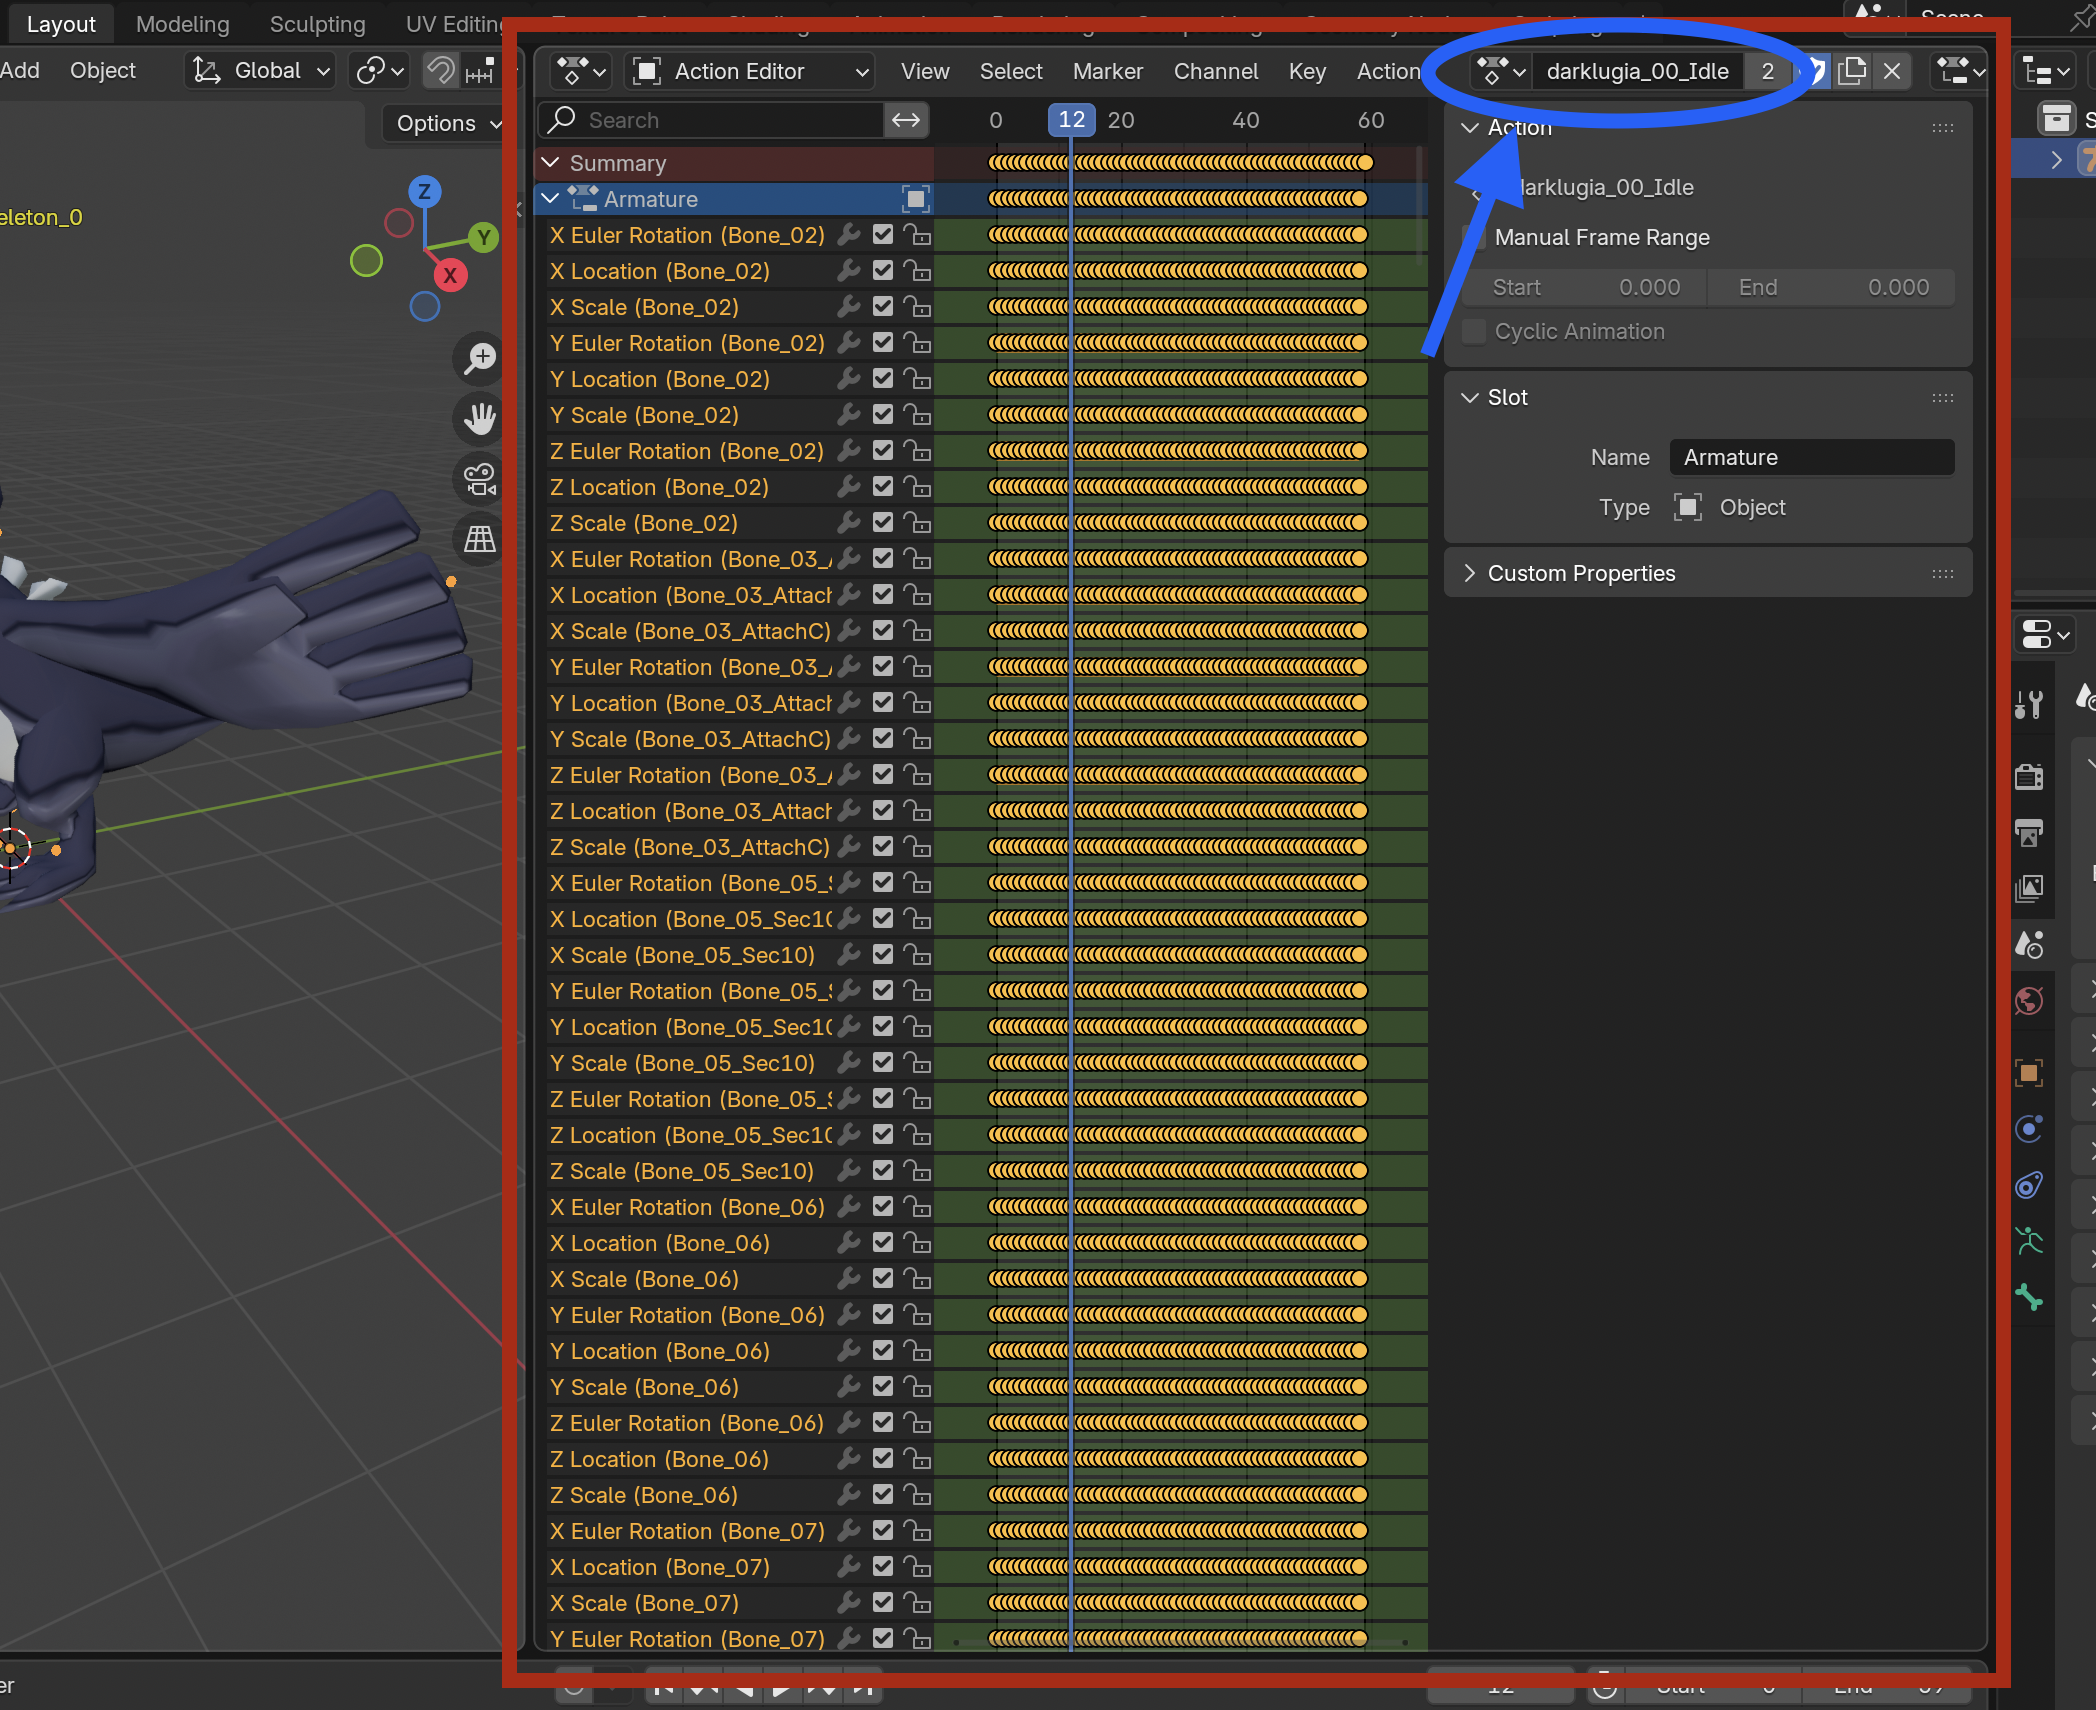
If you left Setup Workspace on, the Action Editor is already open in the right panel. Otherwise, change one of your editor panels to the Action Editor: click the small icon in the top-left corner of any editor and pick Dope Sheet, then in the Dope Sheet's mode dropdown (also top-left) switch to Action Editor.
You may need to scroll the Action Editor's menu bar to the side to see the animations drop-down menu.
Step 2 — Switch between actions
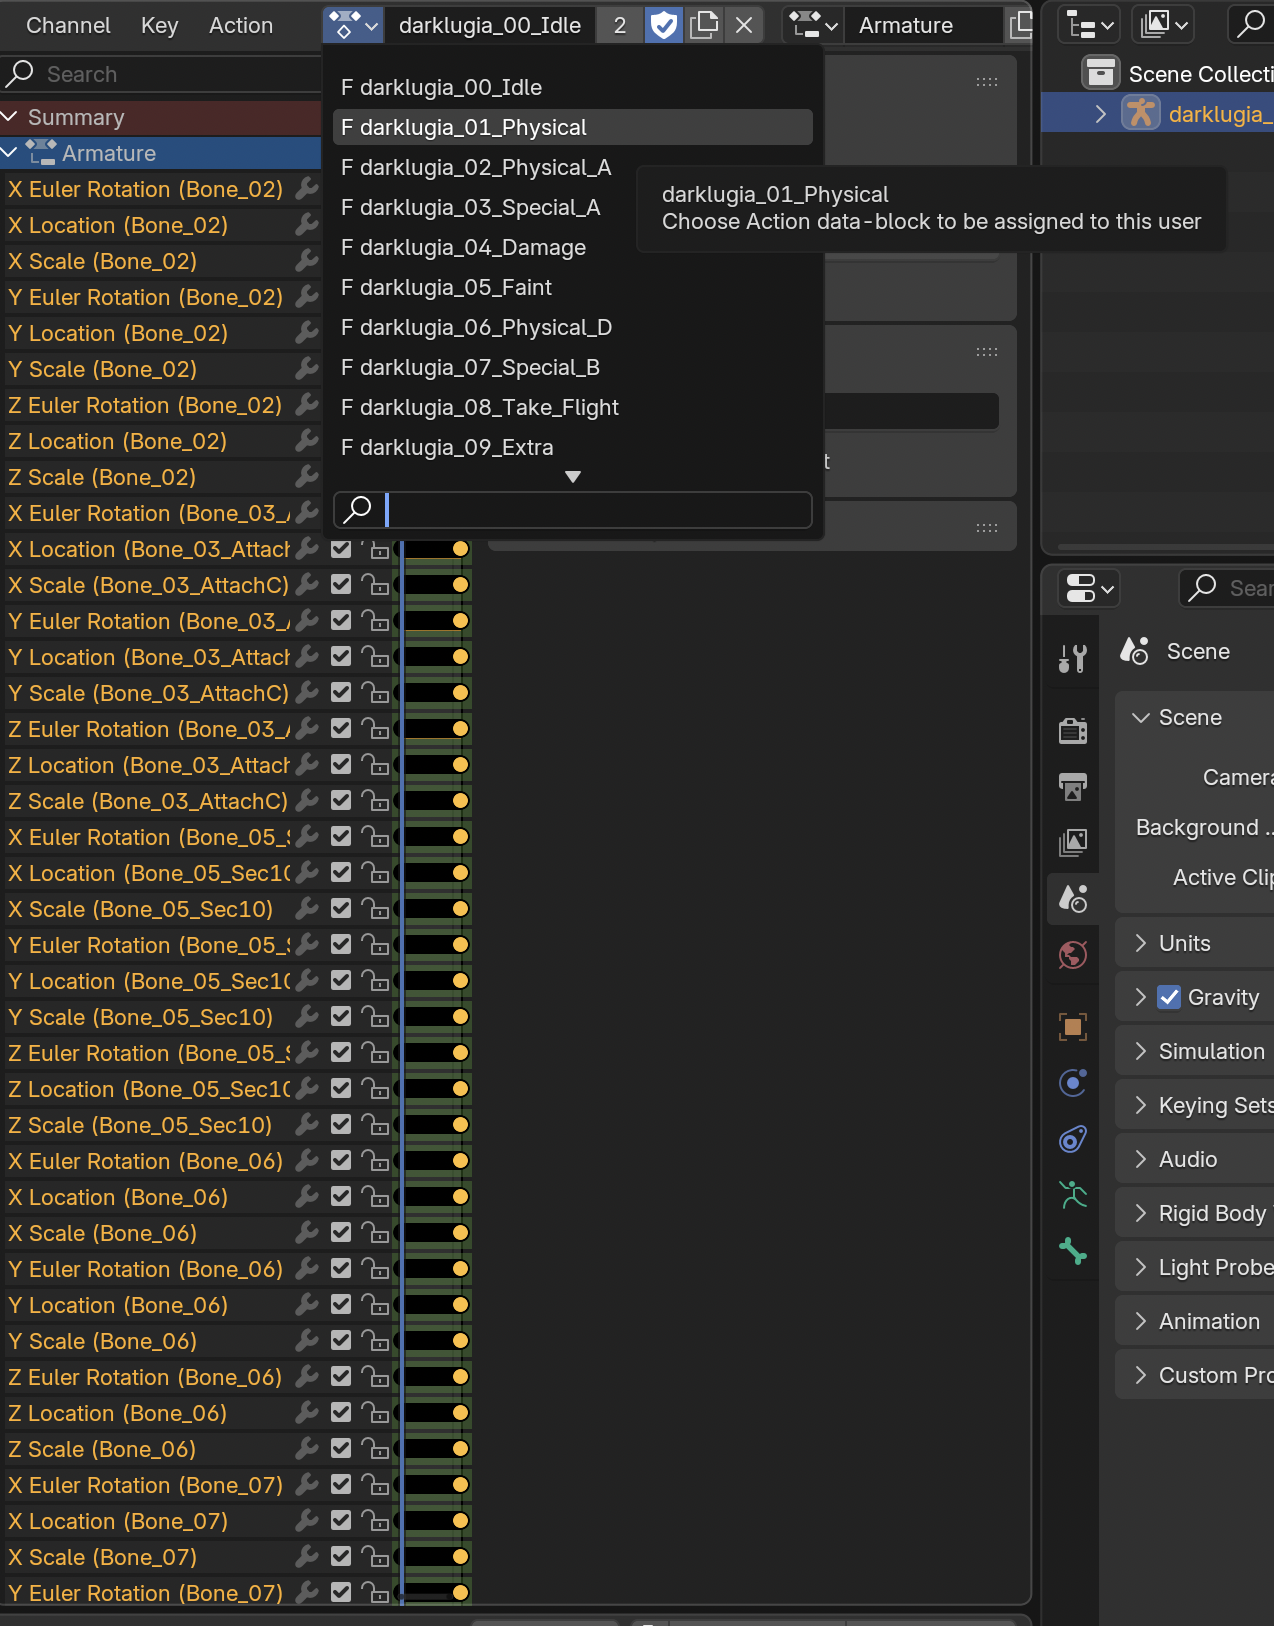
With the armature selected, click the action name (or the small icon next to it) at the top of the Action Editor. A dropdown shows every animation that was imported. Pick one — the viewport updates immediately.
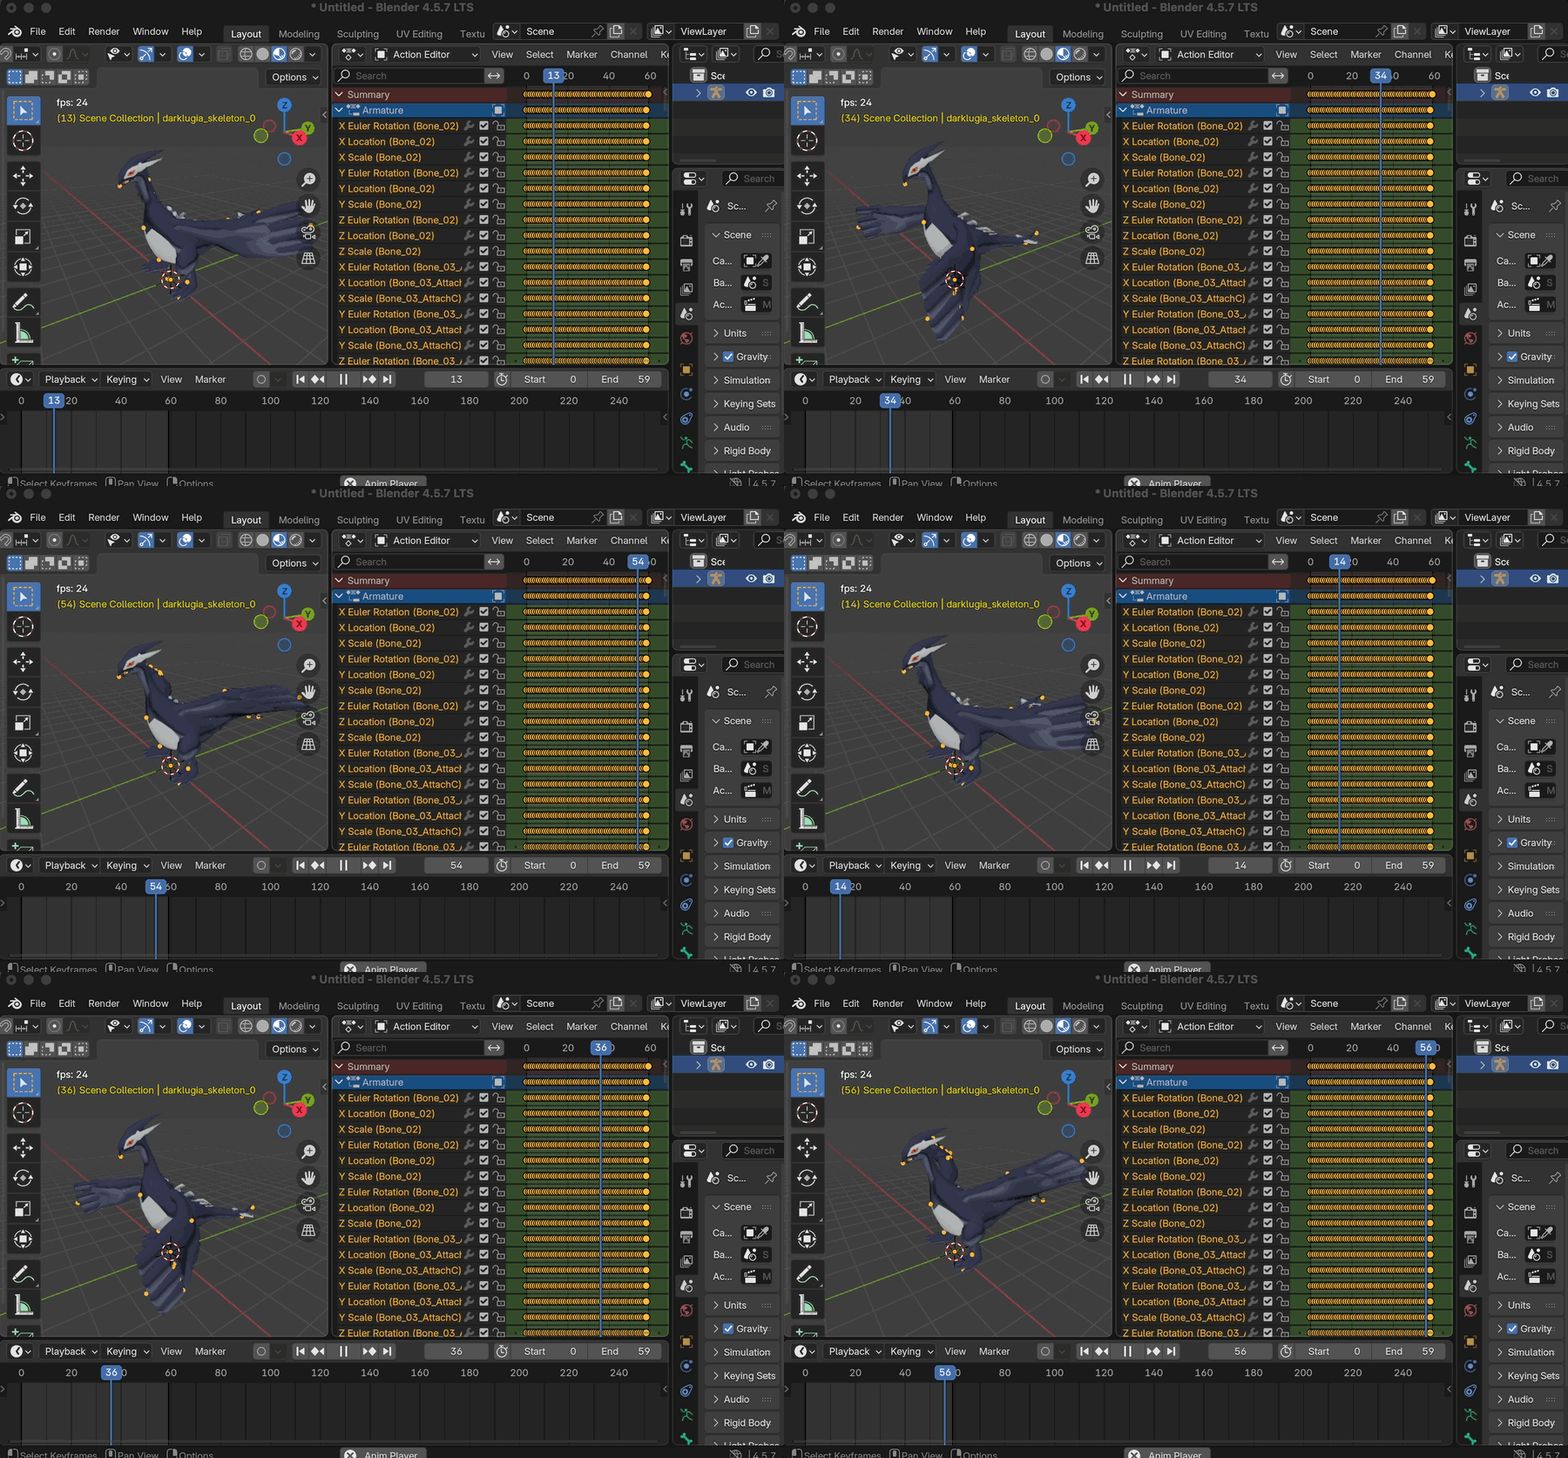
darklugia_skeleton_0.
Step 3 — Play the animation
Press the spacebar to play. The viewport plays the animation in a loop. Press spacebar again to stop. The timeline at the bottom of the screen shows the current frame; drag the playhead to scrub manually. You can usually see roughly how long the animation is by viewing the timeline in the Action Editor above.
Adjusting the playback range
The importer sets the timeline end frame based on the length of the first animation it selects. If you switch to a longer animation and it looks cut off, edit the End field in the timeline header to a higher value (e.g. 200) and play again.

6. Viewing shiny variants (Pokémon)
For .pkx Pokémon models, the addon automatically reads the shiny color
parameters from the file and builds a toggle into the materials that you can use to
enable and disable the shiny colours at will.
Step 1 — Select the model
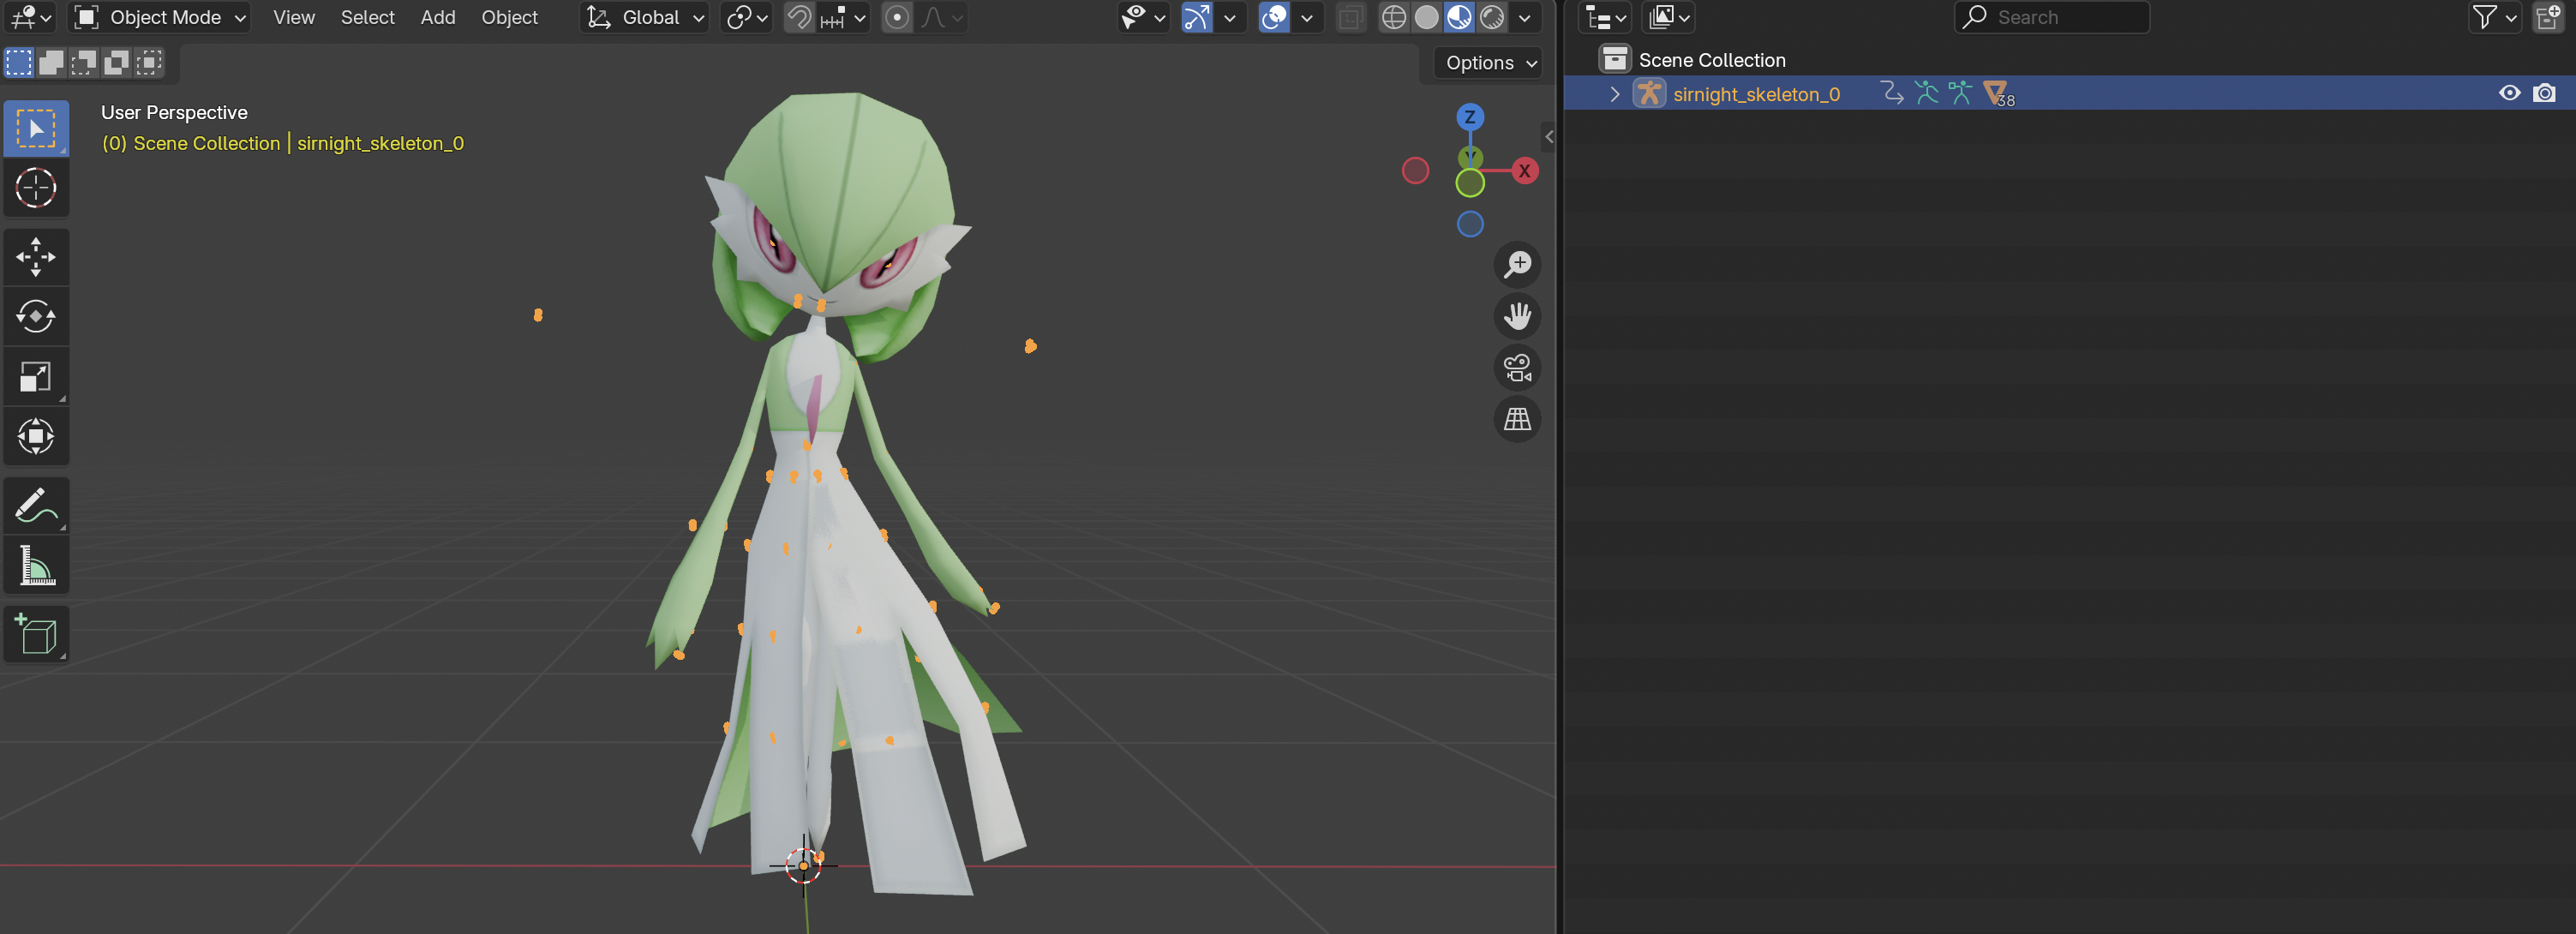
In the Outliner panel on the right, click the model's entry to select it.
Step 2 — Open Object Properties
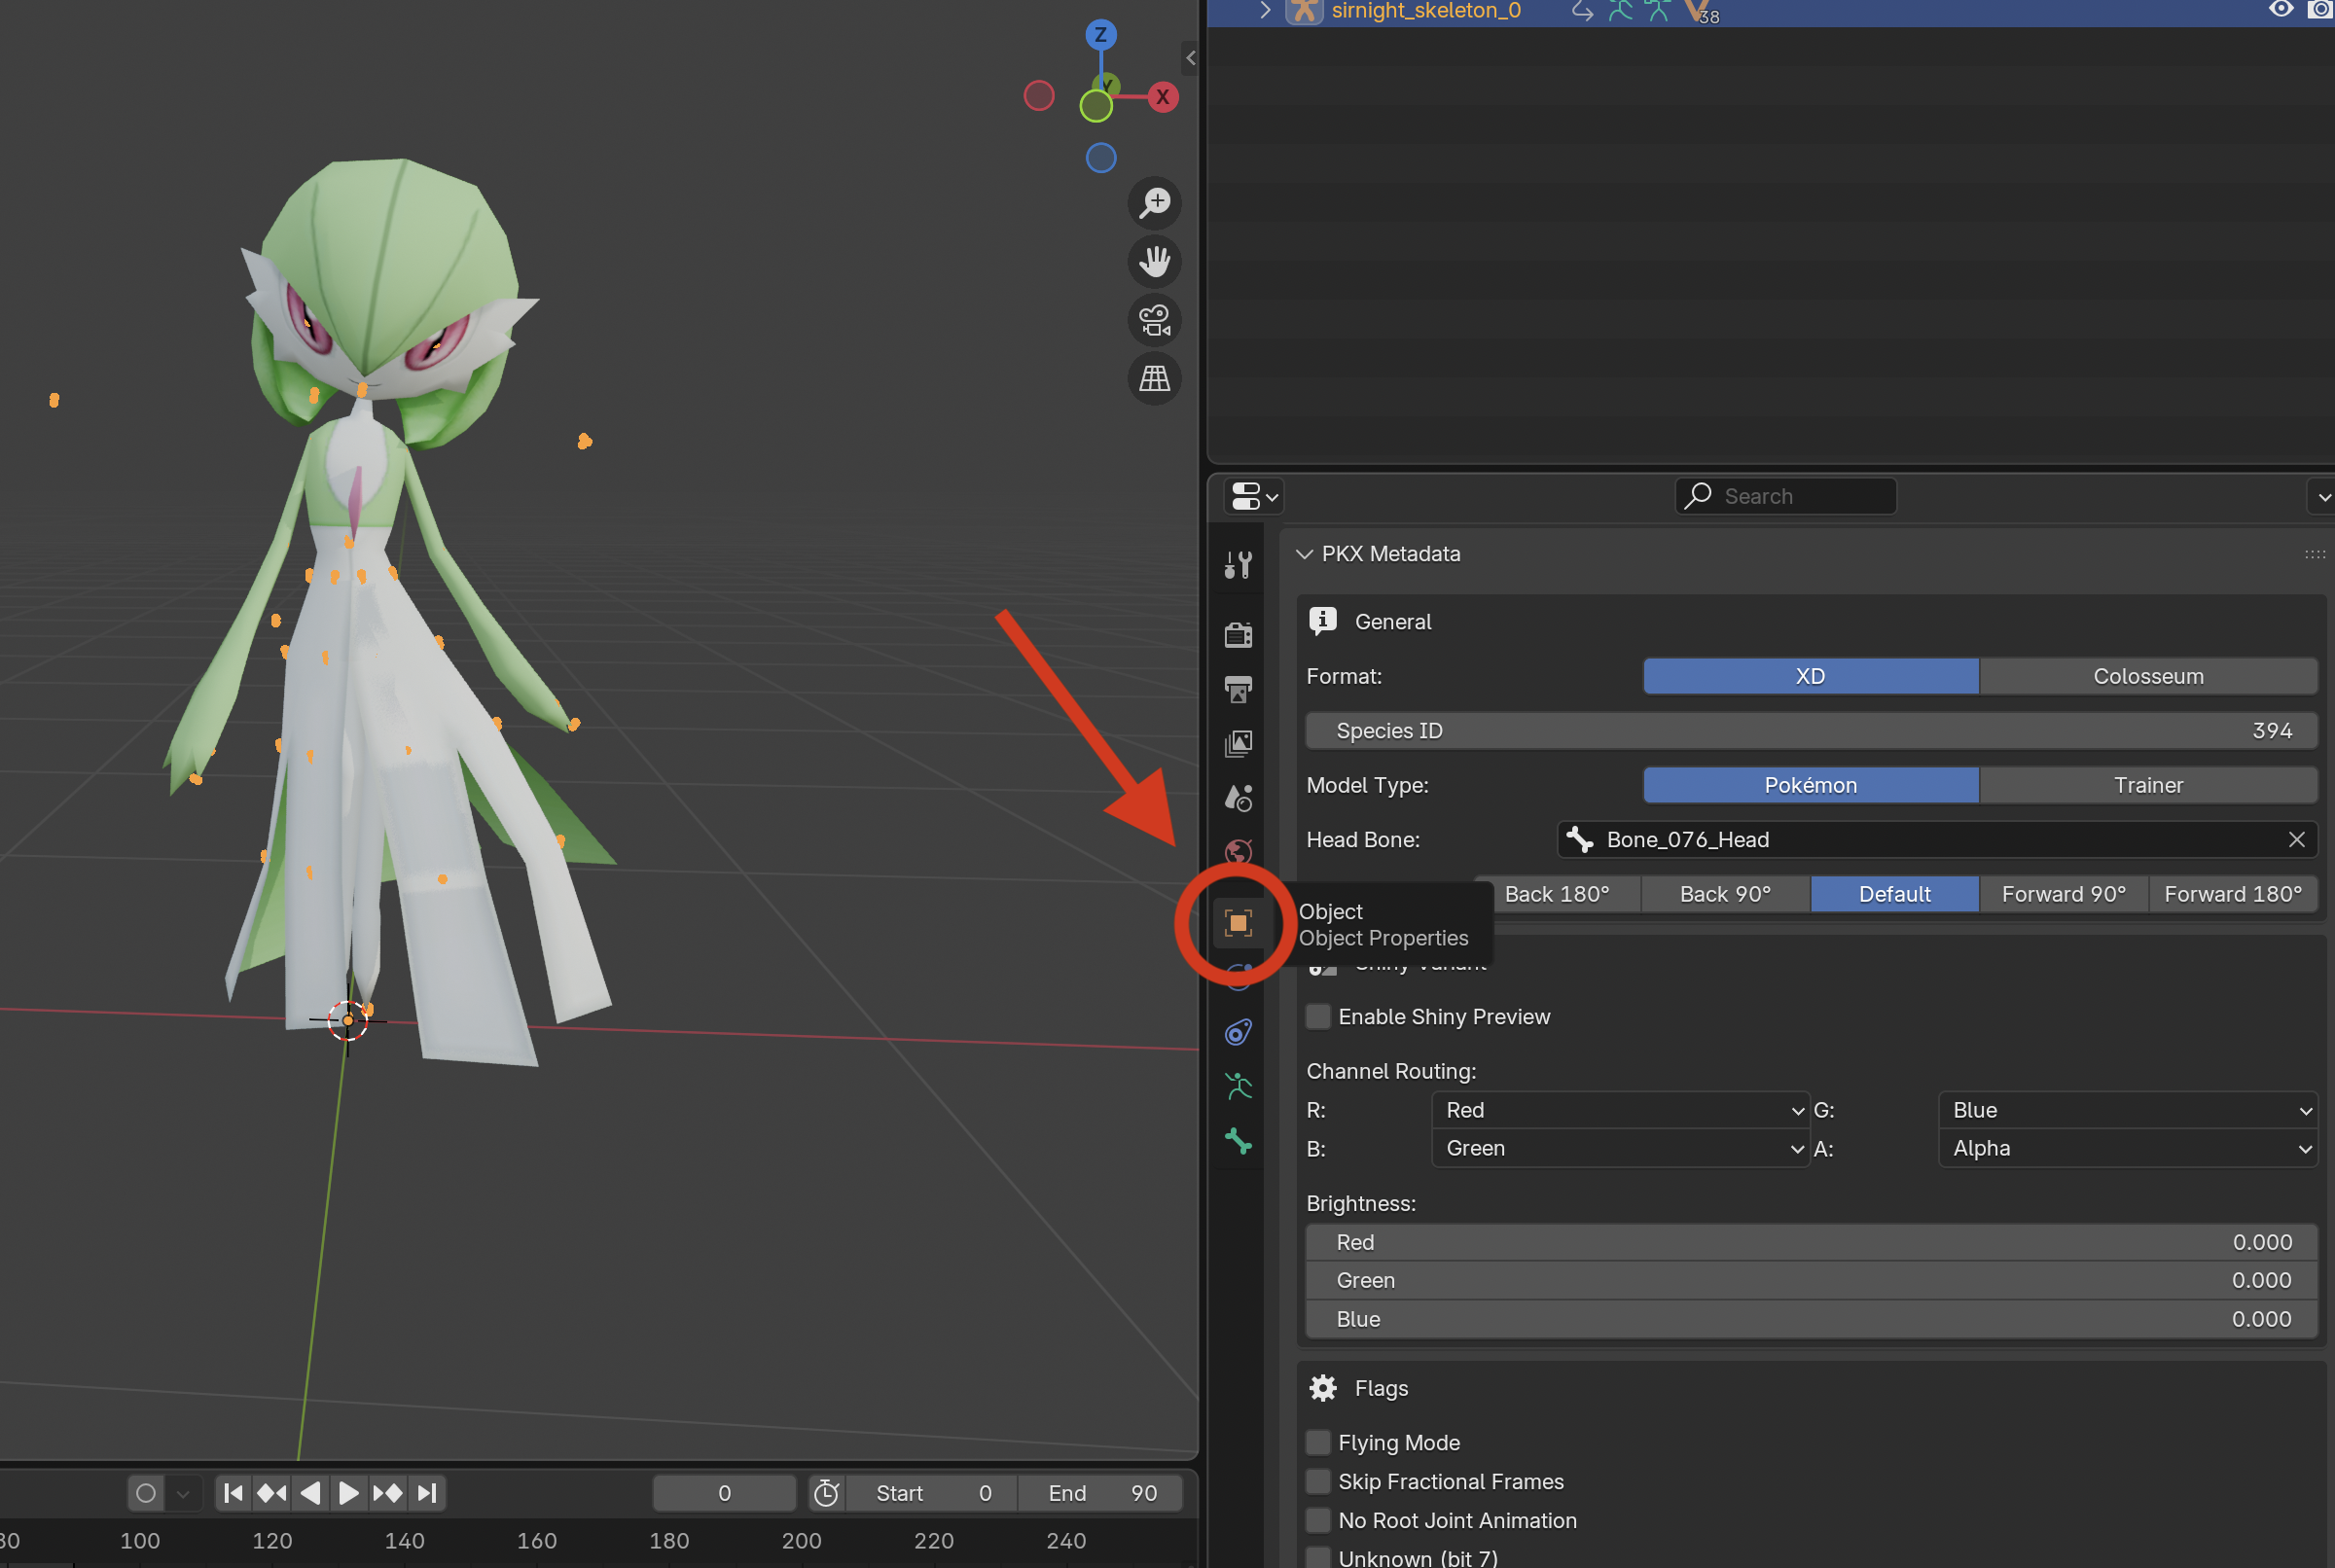
On the right side of Blender, in the Properties editor (the column of tab icons), click the orange square icon — that's the Object Properties tab.
Step 3 — Find the Shiny Variant panel
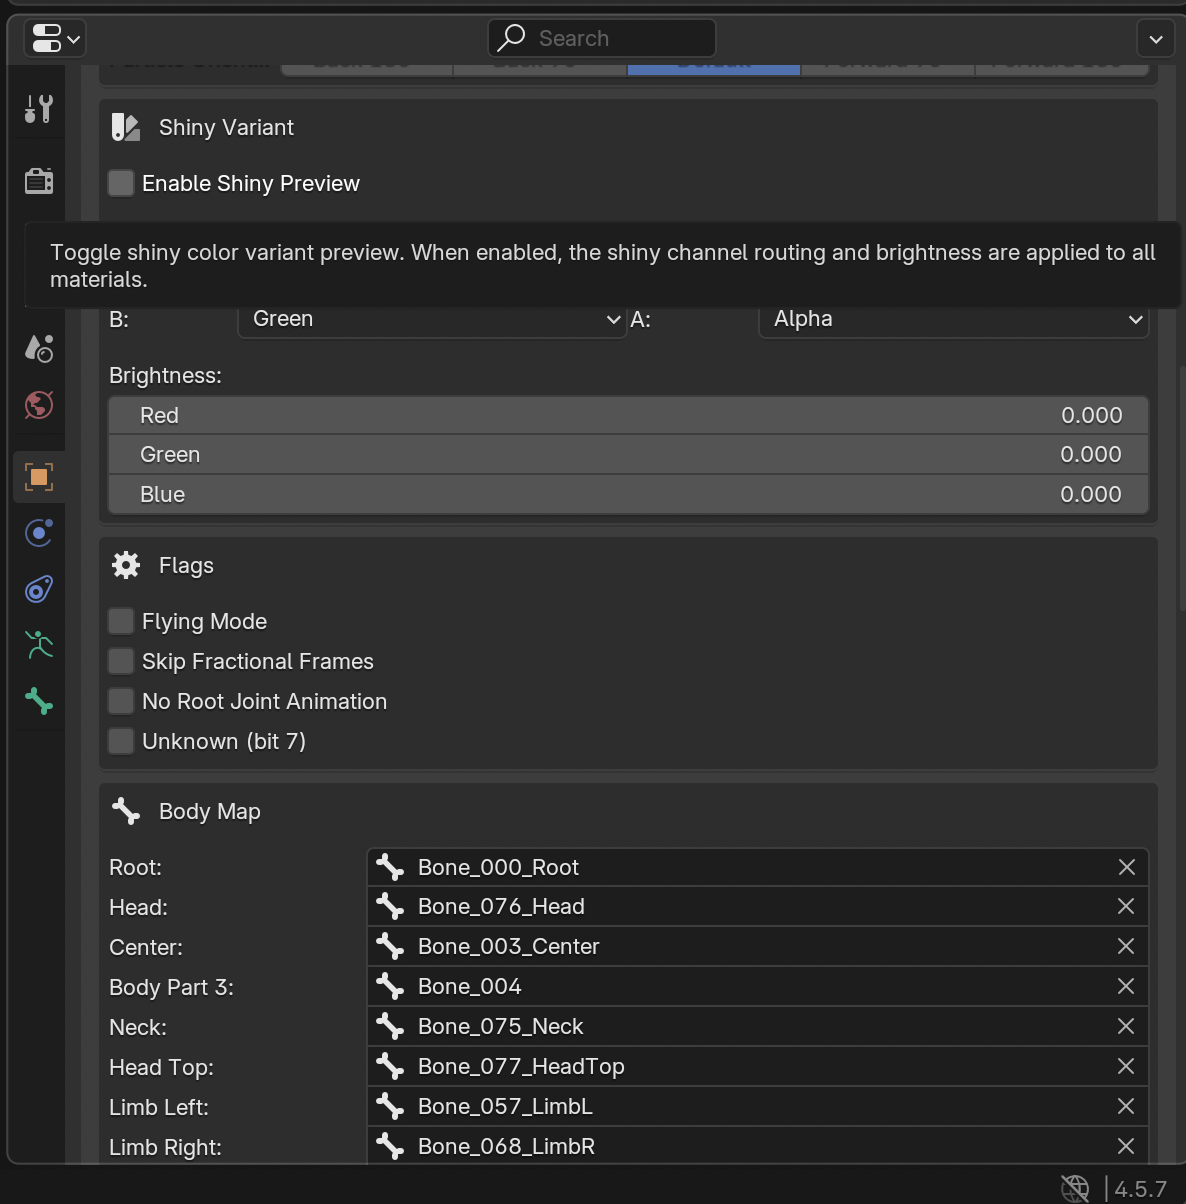
Scroll down inside Object Properties until you find a section called Shiny Variant. Expand it by clicking the triangle next to its name.
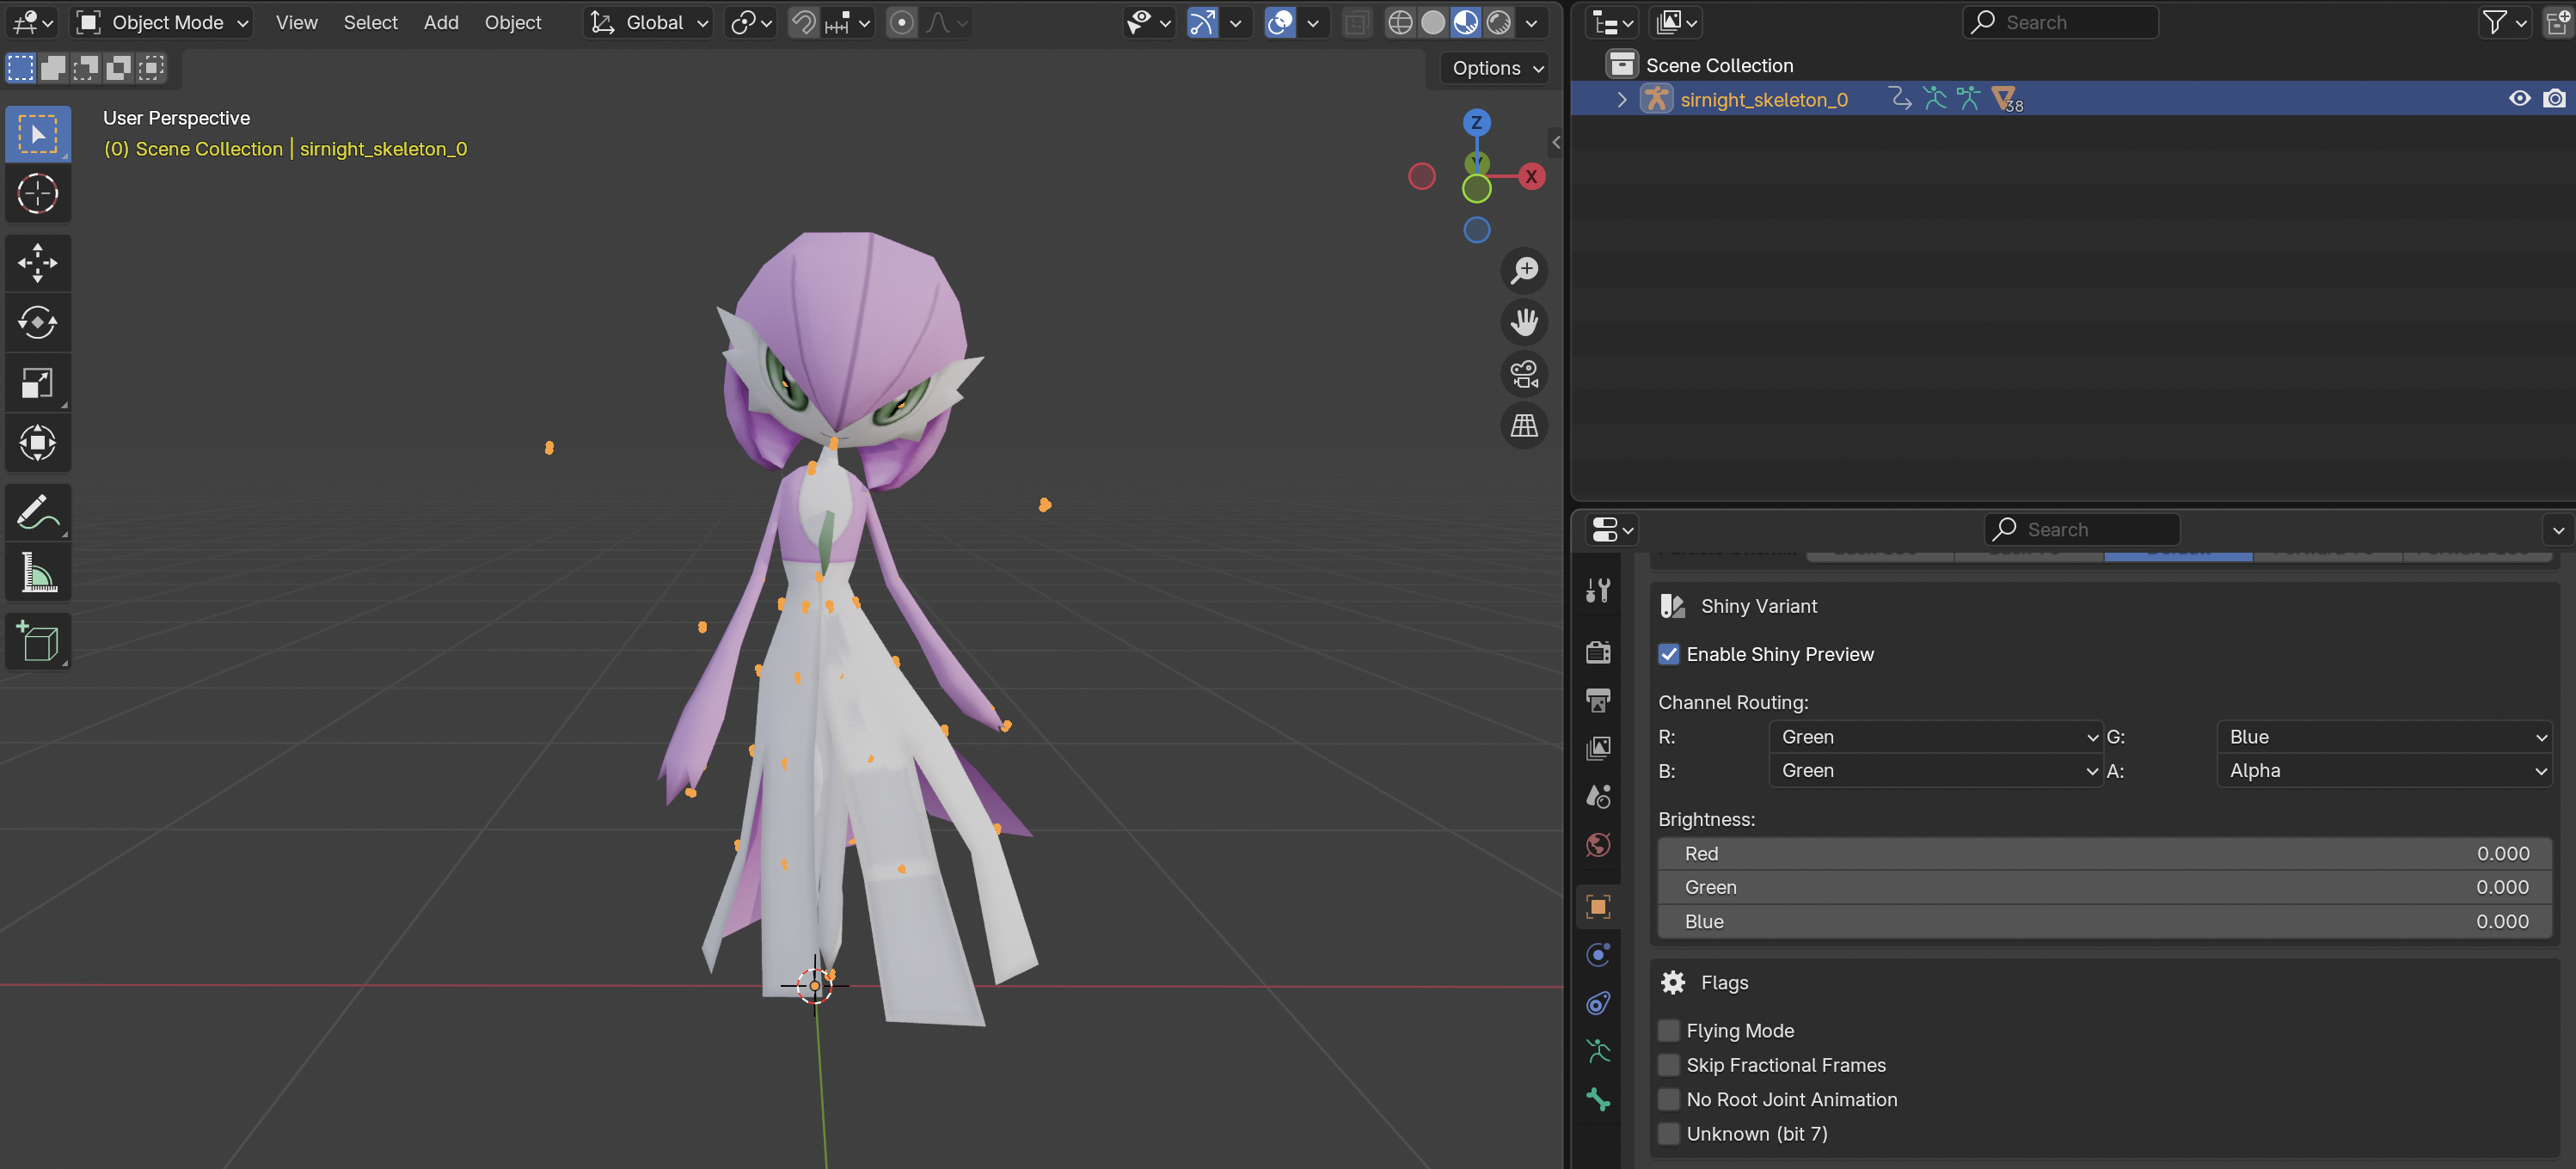
Step 4 — Enable the shiny preview
Click the Shiny checkbox at the top of the panel. The model's colors update immediately to the shiny variant.
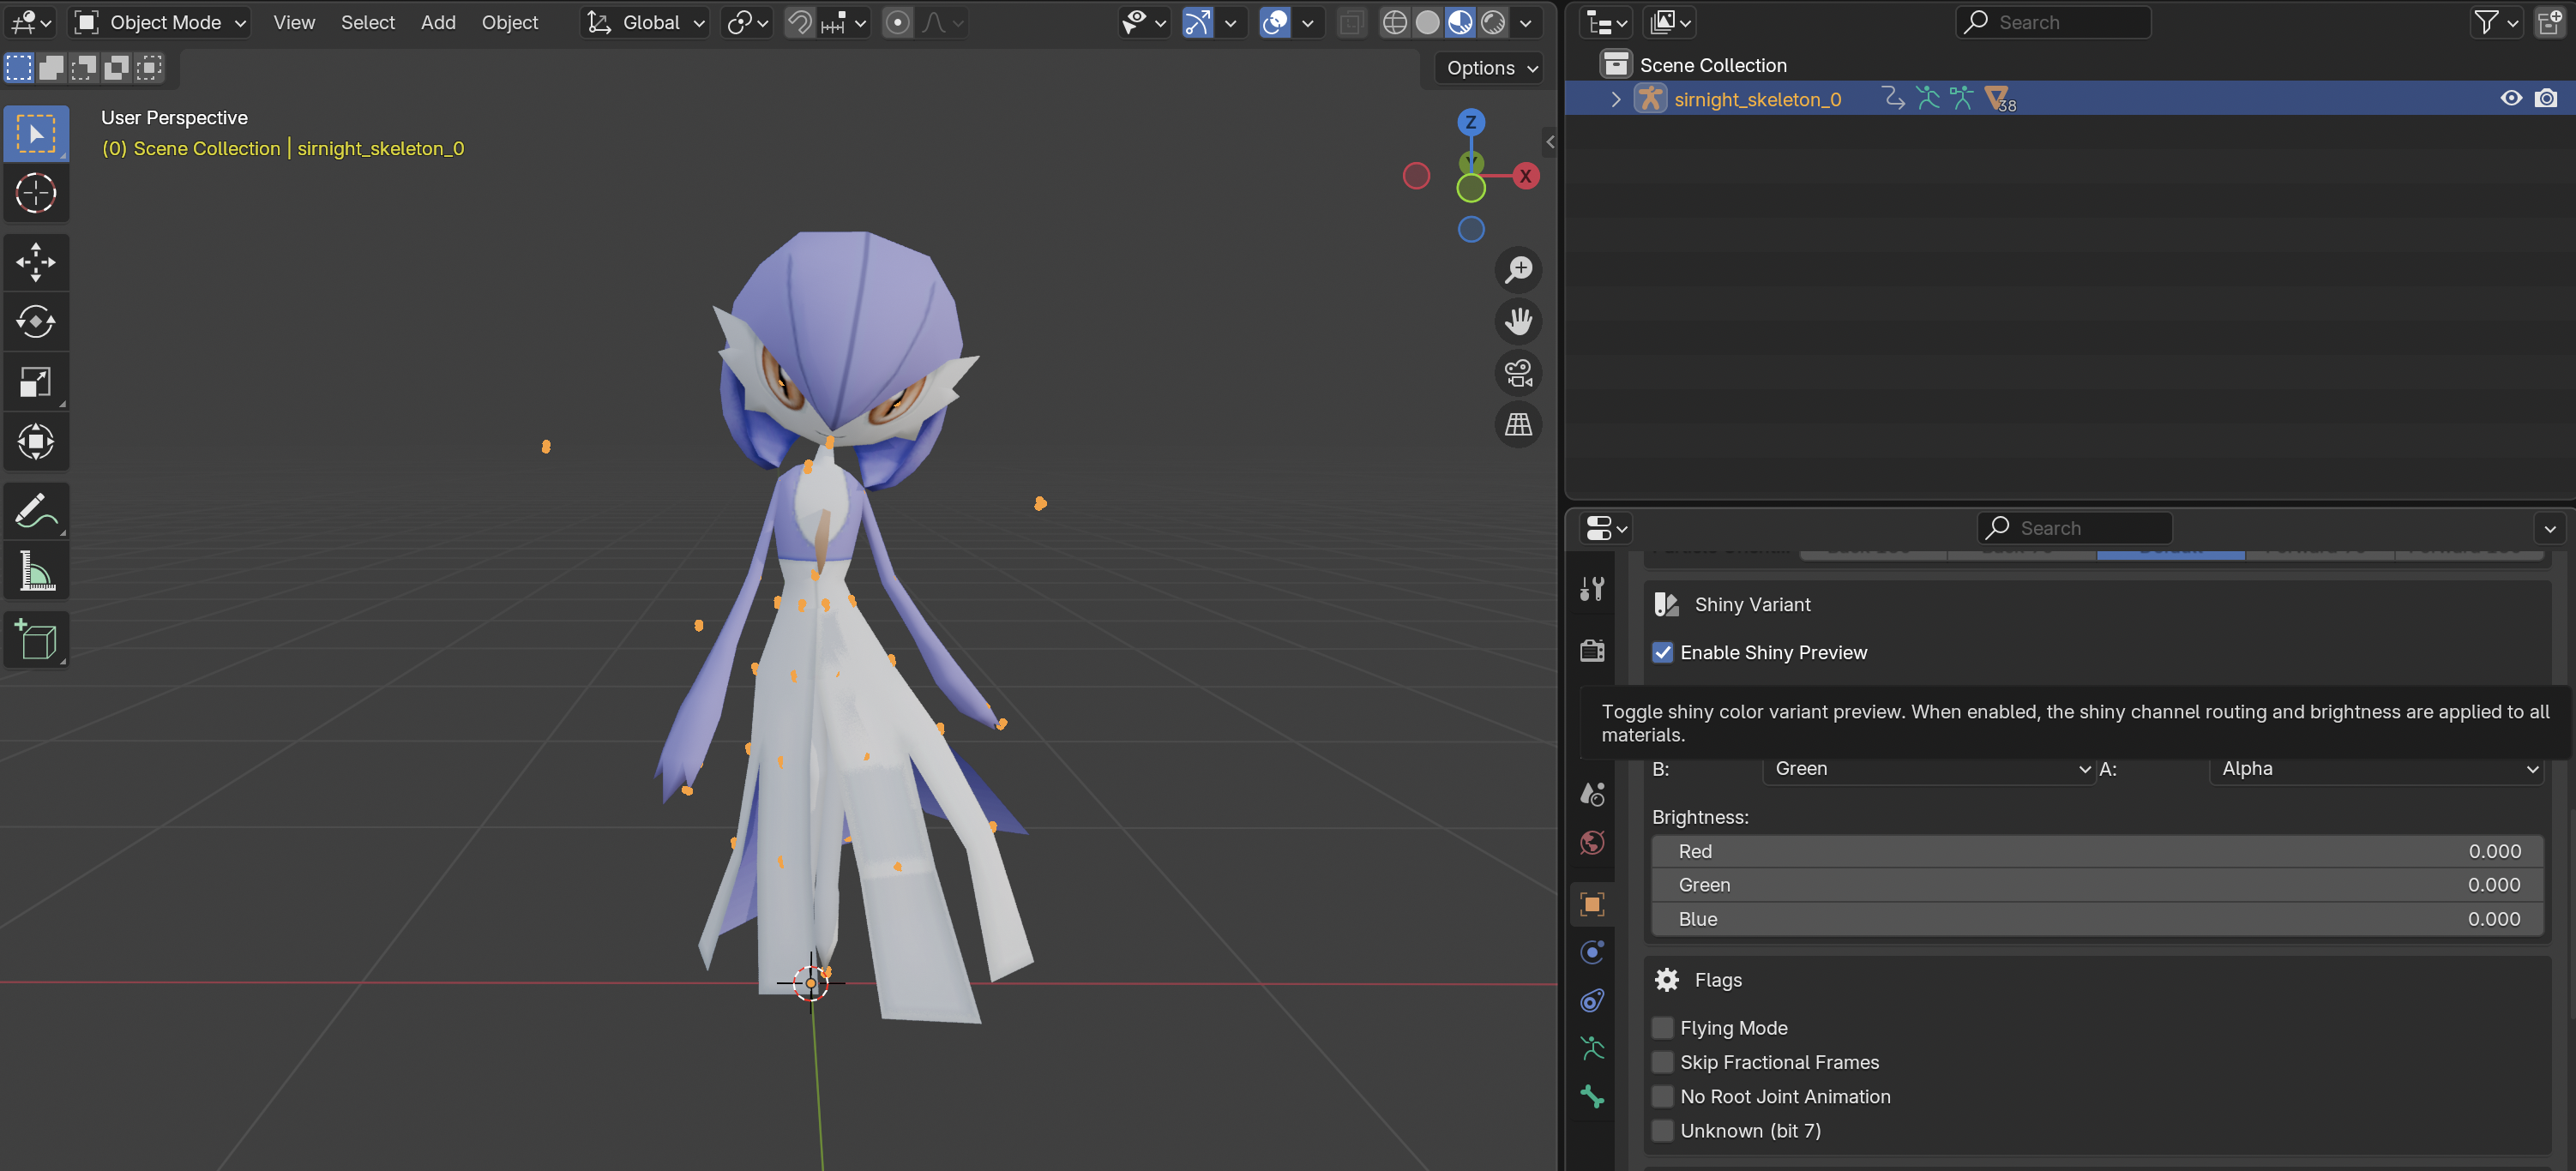
Step 5 — Tweak the shiny values
Inside the panel you can also tweak which color channels are routed where, and adjust the brightness offset per channel. Try different configurations to preview what a custom shiny would look like — the viewport updates live as you update the values.
add_shiny_filter.py
script that applies the same shiny filter logic to any arbitrary model. Run it from
Blender's Text Editor — see the running scripts guide
for the full walkthrough.
7. Troubleshooting
Stub — common import problems and fixes coming soon.
If you hit a problem the docs don't cover, ask on the community Discord: discord.gg/xCPjjnv. Include the file you were trying to import and any error messages Blender showed (the bottom of the Blender window, or Window → Toggle System Console on Windows).